Gross Motor Development Curriculum for Children With Visual Impairments
Lauren J. Lieberman, Ph.D. Pamela S. Haibach, Ph.D.
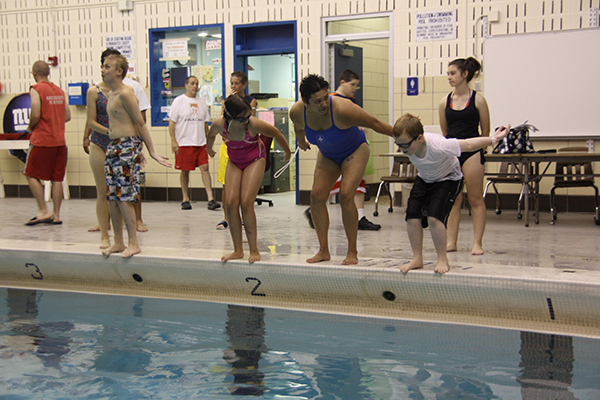
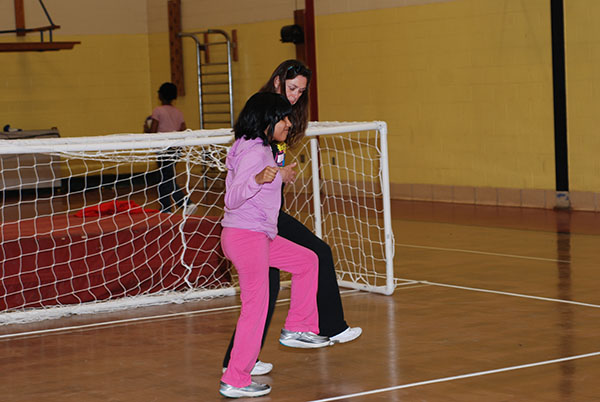
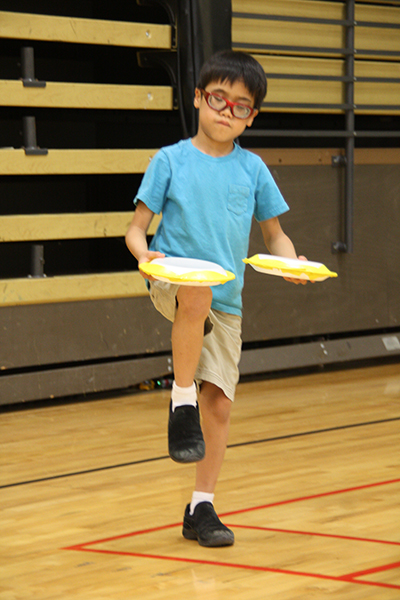
Photos: A girls does a curl-up. Co-author Lauren Lieberman signs to a boy while holding a ball. A teacher and a boy practice throwing a plastic disc. A swim instructor signs to a boy. A teacher provides verbal instruction while a peer tactile models bending her knees for a girl. A teacher and girl practice standing on one leg. A girl prepares to jump. A teacher demonstrates the horizontal jump to a group of children. Co-author Pamela Haibach and a girl practice hopping on one foot.
American Printing House for the Blind, Inc. Louisville, KY
Lieberman, Lauren J. 1965- Gross Motor Development Curriculum for Children With Visual
Impairments/Lauren J. Lieberman, Pamela S. Haibach
In keeping with our philosophy to provide access to information for people who are blind or visually impaired, the American Printing House for the Blind provides this book in large print with braille and HTML versions available online. Hard copy braille is available
upon request.
All rights reserved. Printed in the United States of America
This publication is protected by Copyright and permission should be obtained from the publisher prior to any reproduction, storage in a retrieval system, or transmission in any form or by any means, electronic, mechanical, photocopying, recording, or otherwise.
For information regarding permissions, write to American Printing House for the Blind, Inc., Resource Services, 1839 Frankfort Avenue, Louisville, KY 40206.
To all children who have visual impairments, blindness, or deafblindness.
May you see your ability and become the athlete of your dreams.
Photo: Marla tactile models how to run on a treadmill. A boy touches her elbow to follow her arm movement.
Foreword
Movement is an essential component of a healthy, happy life. Whether you enjoy a casual walk with friends or a competitive game of soccer, all of us can identify the existence of movement in our lives and can attest to the benefits of physical activity. For some of us, movement means time for ourselves—a chance to regroup or unwind from a hectic day. For others, movement is a competitive outlet or a personal challenge—the opportunity to reach a personal best or to win.
For many individuals with visual impairments, including persons with deafblindness, opportunities to move for pleasure or for sport are severely limited. A misperception may exist that individuals with disabilities are somehow exempt from the need to move. This could not be further from the truth. Movement is a sensory experience. We gain information about our world and about our own bodies by moving. We learn to move by watching others; therefore, access to this visual information is restricted for persons with visual impairments. How do you know what running looks like if you have never seen it? How do you kick a ball if you have never watched a game of soccer? It is common for children with visual impairments to arrive at school significantly behind their peers with sight in gross motor development. Without the knowledge on how to perform the most basic motor skills—hop, jump, run, skip, kick, throw—students with visual impairments are less likely to participate in sports that require performance of these basic skills.
To combat this problem, Lauren Lieberman and Pamela Haibach have created Gross Motor Development Curriculum for Children With Visual Impairments. Based on decades of research, this curriculum outlines teaching approaches that are unique to children with visual impairments and that are applicable to the instruction of specific motor skills. There is a misperception that children with visual impairments cannot move like their peers with sight. In reality, their aptitude to move is the same as any child, but sometimes they are unable to access the instruction provided in general physical education classes. When we teach children with visual impairments using methods that are accessible and meaningful to them, we give them the opportunity to reach their potential. For example, the child who is blind cannot simply "watch and do" like her peers with sight. Movement skills must be taught using hands-on, tactile teaching methods. Lieberman and Haibach effectively outline teaching strategies that bring movement instruction within arm's reach of children with visual impairments.
Whether you are a physical education teacher, a teacher of students with visual impairments, an orientation and mobility instructor, or a parent, this curriculum can help you teach a child with vision impairment how to perform basic movement skills. The techniques described may or may not be familiar to you, but their application within the domain of physical education is novel. This curriculum paves the way for increased opportunity for and participation by children with visual impairments in sports and physical activities in educational and community settings.
As a curriculum consultant, I applaud the work of Lieberman and Haibach. Gross Motor Development Curriculum for Children With Visual Impairments is thoughtfully written and easy to implement with students. This curriculum applies evidence-based practice to the domain of physical education for students with visual impairments and will be a valued instructional tool for educators in the field of vision impairment and physical education.
Marla Runyan M.A. Communication Disorders M.A. Special Education, Visual Impairment 2000 & 2004 U.S. Olympian (1st legally blind athlete to compete in the Olympic Games) Teacher of Students with Visual Impairments and Deafblindness
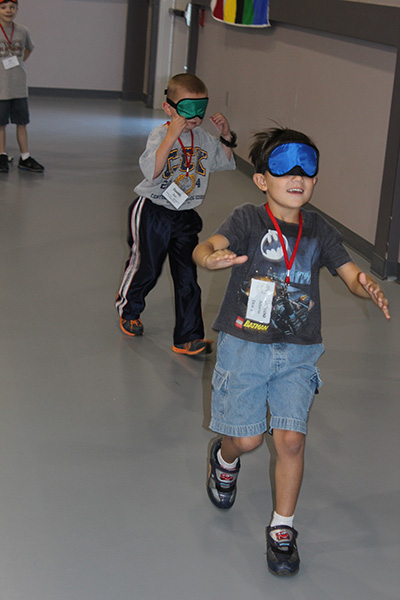
Photo: Two children wear eyeshades and run.
Preface
Children with visual impairments, blindness, or deafblindness require additional support to acquire gross motor skills including modified equipment and specifically trained vision teachers, physical education teachers, and paraeducators. Because of the unique nature of visual impairment, these children need increased time to learn gross motor skills in comparison to their sighted peers. Unfortunately, many of these children are not given the added support and instruction that they need, which often results in gross motor skills that are significantly behind their sighted peers. This gap in motor skill proficiency often increases throughout childhood as many of these children's skill level remains the same.
This curriculum addresses the specific needs of children with visual impairments based upon research findings on fundamental motor skills. The curriculum is divided into two parts: Part I discusses the general instructional strategies that are effective in teaching gross motor skills to this population; Part II details specific teaching techniques, cues, and modified equipment for instruction of 16 gross motor skills.
Teachers, parents, paraeducators, and specialists will find this curriculum helpful and easy to use when they provide instruction in motor development for children who are visually impaired, blind, or deafblind. The instructional strategies work well with many physical fitness or motor development assessments that are available to teachers.
Photo: Lauren teaches a young girl to roll a ball.
About the Authors
Lauren Lieberman, Ph.D.
Lauren Lieberman, Ph.D., is a Distinguished Service Professor at The College at Brockport, SUNY, in the area of Adapted Physical Education. Prior to graduate school, she taught at the Perkins School for the Blind in the Deafblind program for 5 years.
Dr. Lieberman is founder and director of Camp Abilities: A developmental sports camp for children with visual impairments located in Brockport, NY. She has helped start 18 Camp Abilities programs in the U.S. and 7 internationally. Her areas of research include physical activity and inclusion strategies for youth with sensory impairments. She has published more than 90 articles in refereed journals and presented more than 130 presentations in the U.S. and abroad. She has authored or co-authored 15 books, most recently Promoting Language Through Physical Education: Using Sign Language and Spanish to Engage Everyone (Human Kinetics), Assessment for Everyone: Modifying NASPE Assessments to Include All Elementary School Children (National Association for Sport and Physical Education), Essentials of Teaching Adapted Physical Education: Diversity, Culture, and Inclusion (Holcomb Hathaway), Physical Education and Sports for People With Visual Impairments and Deafblindness: Foundations of Instruction (AFB Press), and Everybody Plays! How Kids With Visual Impairments Play Sports (American Printing House for the Blind). She is currently on the board of the United States Association of Blind Athletes and the board of International Federation of Adapted Physical Activity.
Photo: Pamela teaches a young girl to skip.
Pamela Haibach, Ph.D.
Pamela Haibach, Ph.D., is an Associate Professor at The College at Brockport, SUNY. Her area of expertise is motor development and motor learning, and she has published a first of its kind textbook joining motor development and motor learning entitled, Motor Learning and Development (Human Kinetics). Dr. Haibach has two main areas of research 1) postural control and balance, and 2) motor development assessments. More specifically, she examines the influence of vision and other sensory modalities in various human populations, including healthy individuals ranging from children to older adults, special populations including children with CHARGE Syndrome and children with visual impairments and blindness, and older adults with a history of falling. In addition, Dr. Haibach conducts motor development assessments on typically developing children and children with visual impairments to determine the motor skill weaknesses. She uses the information to develop and implement motor skill curriculums for early motor development.
Dr. Haibach has served as the chair of the National Association for Sport and Physical Education (NASPE) Motor Development and Learning Academy. She is a reviewer for adjudicated journals in the fields of motor behavior, aging, and visual impairment.
Message from the Authors
In this curriculum, we use the term visual impairment to mean low vision, visually impaired, or blind. In most cases, the teaching techniques discussed are also conducive to teaching children who are deafblind. When additional techniques are needed for children who are deafblind, the techniques are shared.
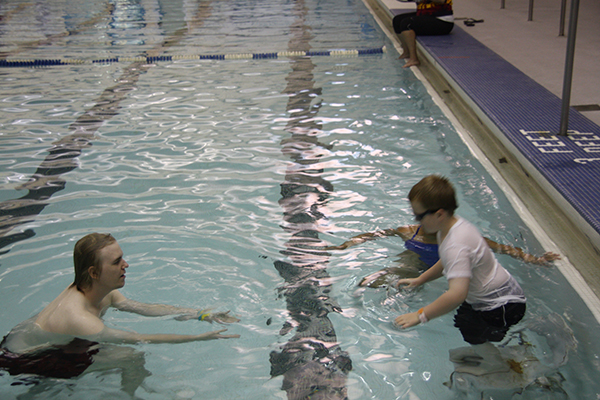
Photo: A coach teaches swimming to a boy using tactile modeling (hand on head) and tactile sign.
Project Contributors
Advisory Panel
Karen Blankenship Assistant Professor of the Practice Vanderbilt University, TN
Monica Lepore Professor of Adapted Physical Education West Chester University, PA
Marla Runyan Teacher of Students with Visual Impairments Assistive Technology Specialist/Spokesperson Perkins School for the Blind, Watertown, MA
Kari Smoker Parent of a child with visual impairment The College at Brockport, State University of New York
Erin Weaver Teacher of Students with Visual Impairments Genessee Valley Educational Partnership, Leroy, NY
Video Reviewers
Rebecca Lytle Dean of Professional and Graduate Studies Keene State College, Keene, NH
Patty Hacker Professor Physical Education Teacher Education College of Education and Human Sciences South Dakota State University, Brookings
Field Test Site Coordinators
Désireé Oestricker PE/Health Teacher St. Louis, MO
Lemi Hayashi Adapted Physical Education Specialist San Jose, CA
Mike Plansker Teacher of Students with Visual Impairments and Certified Orientation and Mobility Specialist Thornton, CO
Hannelore Roesch Orientation and Mobility Instructor Portland, ME
American Printing House for the Blind, Inc.
Project Leader: Tristan Pierce Research Assistant: Monica Vaught-Compton Manufacturing Specialist: Bryan Rogers Art Director: Anthony Jones Cover Designer: Terri Gilmore Technology Product Specialist: Denise Snow Wilson Braille Transcriber: James Williams Graphic Designer: InGrid Design
Acknowledgements
Photographers: Nolan Husley, Lauren Lieberman, Kelsey Linsenbigler, Jeremy Ockerman, Tristan Pierce, and Amanda Tepfer Videographers: Marc Levandowski, Rob Ferries, and Joe Decker Narrator: Davida Bloom Music: performed by Vinny Bassanti
Photo: Children line up in a gymnasium to practice the horizontal jump.Photo: A child imitates her teacher and balances on one leg.
Reviews
This is a wonderful resource. I have used several of the modifications/adaptations for my students with vision, and it was effective for them as well. Adapted Physical Education Specialist
I really liked the curriculum. It broke down the skills in a way that is easy to explain to students. I think the video is an important component. I found seeing the movements in action and hearing the explanation very helpful. Orientation and Mobility Instructor
As someone without a lot of experience teaching students with visual impairments, I found the combination of the video and the book very helpful. I think the video does a really good job of showing general PE teachers like myself what students with visual impairments are capable of. After working with my student on this curriculum, I want to invite her to be part of our Unified Sports team. Our team of coaches had not previously asked her because we weren't sure how to include her in many of the ball sports and now we have some concrete strategies to use. Physical Education Teacher
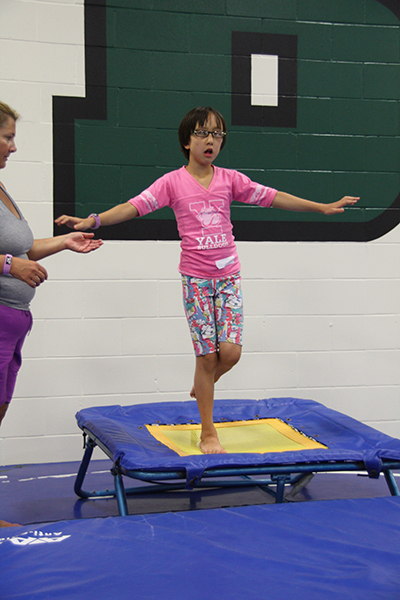
Photos: A teacher uses physical guidance to teach a child proper arm movement while running. A girl hops on a mini trampoline. A teacher helps a child swing a bat at a beeping ball on a batting tee.
Part I General Teaching Methods for Children With Visual Impairments
Photo: A child serves a goalball using the underhand roll.
Chapter 1: Introduction
Photo: A teacher and child look at a guidewire, carabiner, and loop rope, which allow the child to walk, run, hop, or skip independently.
Children who have visual impairments achieve motor milestones and walk independently at a significantly older age than their peers with sight (Heydt, Allon, Edwards, Clarke, & Cushman, 2004). This delay extends to their development of fundamental motor skills. Fundamental motor skills should be developed during critical ages to maximize a child's future performance capabilities in sport and recreational activities.
In a recent study funded by the American Printing House for the Blind (Wagner, Haibach, & Lieberman, 2013), 100 children age 6-12 years with visual impairments and blindness were assessed on their gross motor skills using the Test of Gross Motor Development, Second Edition (TGMD-2). Results show that these children are behind their peers who have sight in their motor skill development overall (Wagner & Haibach, 2012). Older children did not perform better than younger children, and boys and girls performed equally. The children with blindness had lower motor development scores than their peers with partial sight (Wagner et al., 2013).
Proficiency in motor skills is foundational to an active lifestyle in childhood and beyond (Barnett, Morgan, van Beurden, & Beard, 2008; Cantell, Crawford, & Doyle-Baker, 2008). An active lifestyle at any age has been associated with improved health and fitness indices and well-being (Cantell et al., 2008; Cawley & Spiess, 2008; Hands & Larken, 2006; Hands, 2008). Quality of life and independence are a focus of the Expanded Core Curriculum (ECC), which many in the field of visual impairment promote. The ECC has nine components: social interaction skills, independent living skills, recreation and leisure skills, compensatory of functional academic skills, self-determination, orientation and mobility, career education, use of assistive technology, and sensory efficiency skills (American Foundation for the Blind, 2012). Increased opportunities to meet the ECC components will increase opportunities for employment and increase life satisfaction in individuals with visual impairments. The utilization of this gross motor development curriculum and video brings the children with whom you work one step closer to making this a reality.
Table 1 Motor Skill Indentifier
Motor Skill Identifier helps locate specific skills within a particular assessment.
Skill
Assessments*
Balance
APEAS II
BOT™-2
DEVPRO
Run
APEAS II
BPFT
BOT™-2
DEVPRO
TGMD-2
Gallop
APEAS II
DEVPRO
TGMD-2
Hop
APEAS II
BOT™-2
DEVPRO
TGMD-2
Leap
TGMD-2
Skip
APEAS II
DEVPRO
TGMD-3
Hor. Jump
APEAS II
BOT™-2
DEVPRO
TGMD-2
Slide
DEVPRO
TGMD-2
2-Hand Str.
DEVPRO
TGMD-3
1-Hand Str.
TGMD-2
Dribble
BOT™-2
DEVPRO
TGMD-2
Catch
APEAS II
BOT™-2
DEVPRO
TGMD-2
Kick
APEAS II
DEVPRO
TGMD-2
Overhand Throw
APEAS II
BOT™-2
DEVPRO
TGMD-2
Underhand Roll
TGMD-2
Curl-ups/Sit-ups
APEAS II
BPFT
BOT™-2
FITNESSGRAM®
Push-ups
APEAS II
BPFT
BOT™-2
FITNESSGRAM®
*Adapted Physical Education Assessment Scale II (APEAS II); Brockport Physical Fitness Test (BPFT); Bruininks-Oseretsky Test of Motor Proficiency, Second Edition (BOT™-2); DEVelopmental PROgramming Motor Skills Assessments (DEVPRO); FITNESSGRAM®; and Test of Gross Motor Development, Second Edition (TGMD-2) and Third Edition (TGMD-3) (in development)
Figure 1-1. Photo: A child wearing eyeshades uses a bat to strike a beeping ball from a batting tee.
Every child is unique and has her own experiences, level of visual impairment, development, and goals. At the same time, it is important to keep in mind that there are some general rules to consider when you instruct any child who has a visual impairment. Please see Table 2: Tips for Teaching Children who Have Visual Impairments or Blindness, to ensure that each child is treated fairly, respectfully, and with dignity.
Table 2 Tips for Teaching Children who Have Visual Impairments or Blindness
How do you treat a child who is blind? Answer: Like a child
Treat the child as part of the class. The same disciplinary rules should apply to everyone. Make exceptions only when necessary, just as you would for any other child.
Speak naturally when you talk. Don't be afraid to use words that refer to seeing. However, the words "here" and "there" are too general for descriptive use. Be specific, and label objects that give direction and location.
Gestures are not always enough. In a group setting, call the child by name when you want a response from him or her.
Use sound to help the child. Your voice leads and directs a child with visual impairment within the environment. Get the child's attention before giving instructions. A moving speaker confuses a child. Describe with clear directions and in a normal speaking voice where you are and how the child can reach you.
Help make the sound environment meaningful for the child with visual impairment. Eliminate confusing or conflicting sounds. The sorting of sounds is a difficult skill that takes time, experience, and explanation to develop.
Explain what is happening around the child. Show from where sounds and smells are coming. As the child explores, describe everything with variety, quality, and richness.
Orient the child to the classroom and equipment in the gym. Let the child know if you have moved objects in the room. Independent mobility is important and sometimes difficult for children with visual impairments.
Avoid overprotection. Remember that all children get bumps and scrapes occasionally. Safety is important, but overprotection can be just as detrimental to a child as under protection.
Encourage independence. Let the child do as much as possible for himself.
Build the child's self-confidence by letting her try. Take the child through an activity or game a couple of times before requiring independent movement. For a sighted child, motor imitation is a visual skill, whereas a child with a visual impairment needs to experience the activity physically.
Answer questions simply and naturally. The other children will ask questions about a child with visual impairment.
Consider the available light sources. Light can be distracting for some partially sighted children, while for others indirect lighting may be inadequate.
Teach the child through the remaining senses. A child who has a visual impairment cannot learn by observing and imitating the action of others. You may need to put the child through an action physically or allow the child to experience the actions you are performing.
State your name when approaching a child with a visual impairment. Voices are not always easy to identify, particularly in crowds or stressful situations. Also, introduce others in the room, especially if they are newcomers or people who are not usually in the classroom.
Relay accurate information to the child with a visual impairment in order to maintain a sense of trust.
Address the student directly, not through a companion or guide.
If you are talking to a student with blindness and you have to leave, tell her that you are leaving! People look silly talking to themselves thinking you are there.
Do not raise your voice so the child will understand you better, unless the person is hearing-impaired also.
Doors should be completely closed or completely open. A half-open door is a hazard to a person with blindness.
Do not be a servant. Do things together.
Ropes taped to the floor help students with visual impairment to identify activity boundaries.
Occasionally blindfold the students with sight and play a game. This increases empathy for and acceptance of the student who is blind.
Do not think of them as blind children. They are children who happen to be blind.
Adapted from Games for People with Sensory Impairments (pp. 279-283), by L. J. Lieberman and J. F. Cowart, Louisville, KY: American Printing House for the Blind. Copyright [2011] by APH.
In addition to information presented in Table 2, it is important to keep in mind guide techniques when you work with a child who has a visual impairment. Use the human guide technique when a child who is blind needs assistance traveling from one place to another. As the name "human guide" implies, another person guides the child with visual impairments. The guide should first ask the child if she would like to "take an arm" or "take an elbow." The child holds the guide lightly just above the elbow and then walks a half step behind, following the guide's movements to the desired location. Small children may need to take the guide's hand or forearm. Most people who have been visually impaired for even a brief time will be able to follow the guide easily. Some children prefer to know about upcoming stairs, or they may prefer a brief pause; but it is typically not necessary to announce turns or stops because the guide's body movement gives that information.
Figure 1-2a.Human guide technique: Photo: A taller child holds just above the guide's elbow. Figure 1-2b.Human guide technique: Photo: A shorter child holds the guide's wrist while ascending stairs; the guide is one step ahead of the child.
It is highly recommended that every parent, teacher, and paraeducator take the time to simulate the visual impairment of the child(ren) with whom he or she works. This opportunity will help them understand what a child needs in terms of verbal and physical support. To view simulations of visual impairments, visit the Arizona Center for the Blind and Visually Impaired, Vision Loss Simulation Presentation Website: http://www.acbvi.org/Vision/index.html
Figure 1-3a.Parent wears simulator: Photo: A mother plays cornhole with one eye occluded.Figure 1-3b.Parent wears simulator: Photo: A father plays basketball with both eyes simulated to match that of his child's.
Chapter 2: Instructional Strategies
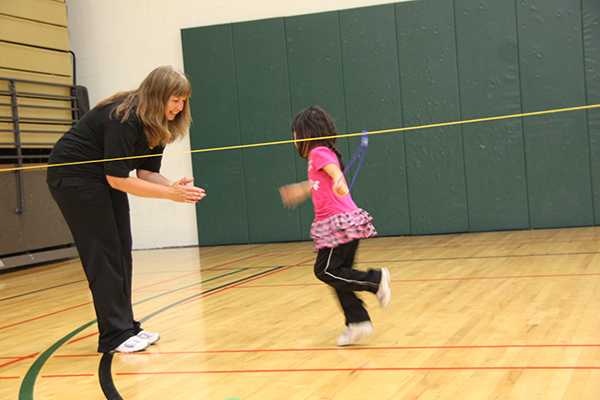
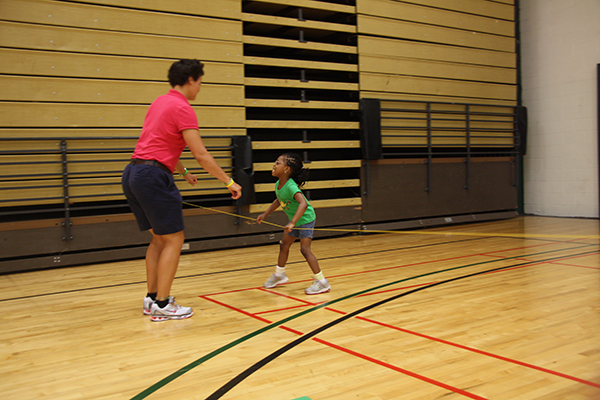
Photo: A teacher gives verbal instruction to a child while an older peer demonstrates jumping rope.
Before you instruct children who have visual impairments, keep in mind the following teaching tips:
Check with parents and physicians to ensure the children do not have any contraindications (shunts, glaucoma, detached retina, etc.)
Find out what previous experiences they have so that you start at the appropriate level.
Make sure the children have sneakers that are for activity so they feel good about their movements and enjoy the activities. Fashion sneakers are not appropriate or safe.
Whenever possible
A 2:1 instructor ratio is preferred to a 1:1.
Use a mirror for the child to see his movements.
Use sound and song to motivate movement.
Include a description of body parts until the child knows every part of the body by name (knees, shoulder, elbow, ankle, foot, etc.) so he understands cues related to body parts.
Figure 2-1a. Photo: Fashion sneakers shown here are not safe to wear when playing sports: slip-on sneakers Figure 2-1b. Photo: Fashion sneakers shown here are not safe to wear when playing sports: Mary Jane-style sneakers
The instruction of complex movement skills such as jumping, catching, or running for children with visual impairments may at first seem difficult to the average parent or teacher. Thus, instructors with no knowledge of instructional modifications are likely to attempt verbal descriptions only; they may have difficulty determining where to begin physical assistance.
Children with significant visual impairments learn by description, observation, and prior experience just as other children do. Therefore, the modifications presented here pertain to how to work around the instructional barriers using whole-part-whole instruction, verbal instruction, task analysis, modeling, and demonstration.
Pre-teaching
Because teaching motor development skills to a child with visual impairment takes longer than teaching a child with sight, many motor development skills should be taught as a pre-teaching experience; or in other words, the skill should be introduced to the child a week or two before it is taught in the physical education class. It will benefit the child, his classmates, and teacher if the child knows the skill before the teacher introduces or incorporates it into a unit. Pre-teaching helps a child participate in class with more confidence, knowledge, and understanding to be a successful mover.
Figure 2-2. Photo: A coach facilitates tactile inspection of a batting tee as part of pre-teaching.
Whole-part-whole instruction
The organization of knowledge should be an essential concern of the teacher so that the direction from simple to complex is not from arbitrary meaningless parts to meaningful wholes, but instead from simplified understandable wholes to more complex understood wholes (Knowles, 1988). According to Park, Wilde, and Shea (2004), when one only teaches the whole skill, the child does not retain the parts of the skills and the process is very slow. According to Nettlebeck and Kirby (1976), teaching the parts of a skill is superior to the whole and requires less training time for people who are able-bodied. Kurtz and Lee (2003) found the opposite to be true in that teaching the whole to learn perceptual information provides a rich basis for perceptual information. Swanson and Law (1993) support whole-part-whole learning and believe that there is a natural rhythm to this approach to learning. "It is not only the mastery of each individual part of instruction that is important, but the relationship between those 'parts' through the 'second whole' that provides the child with the complete understanding of the content" (Swanson & Law, 1993, p. 47).
Within the whole method, it is possible to practice the whole skill, yet maintain focus on a specific part that needs improvement. After the child successfully achieves the performance criteria for the individual parts or components within the whole, the instructor links these parts together. This approach provides both the advantage of part practice and the advantage of whole practice (Magill, 2011). Feedback about performance is one of the most powerful variables that affect the learning of motor skills (Magill, 1993). It is not only the mastery of each individual part of instruction that is important, but the relationship between these parts and the whole movement method that provides the child with the complete understanding of the content. The whole-part-whole is an effort to acknowledge and utilize theory and best practices to design sound learning programs (Swanson & Law, 1993). As noted in the introduction, proven scientific studies support the whole-part-whole as the most effective method pedagogy to deliver motor skills to the child or player.
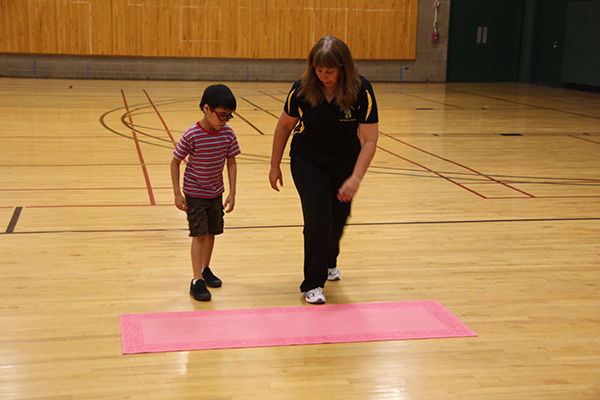
Figure 2-3. Photo: A teacher demonstrates how to leap over a yoga mat to a child.
The authors of this curriculum believe that if children who have visual impairments learn the whole, they have a foundation for the concept development of a skill or game. Without the whole, the parts would be meaningless. Teaching the whole of a skill or game to a child who has low vision or is blind takes time, energy, and creativity; but the resulting knowledge gained about future skill development is priceless. This curriculum endorses the whole-part-whole teaching method; in the authors' collective experiences, this technique is most successful.
Teach the whole through the teaching techniques of verbal instruction and task analysis coupled with tactile teaching. Tactile teaching includes tactile modeling, coactive movement, and physical guidance. According to O'Connell (2000), each technique is equally effective in the skill acquisition for children with visual impairment or blindness.
Verbal instruction
The key to using verbal instruction effectively is the use of precise language and common analogies. If the skill is more complicated or the child has little previous experience, the skill may need to be broken down into smaller pieces in a process known as task analysis.
It is important to use specific teaching vocabulary when working with children who are visually impaired. There is no place for the general slang words commonly used in our everyday language, such as "that," "heads up," and "over there." Precise and clear language is critical when you describe movements in this curriculum because of their complexity (Lieberman, Ponchillia, & Ponchillia, 2013). Children who have severe visual impairments are dependent upon instructors to use the same terminology consistently in order to assimilate definitions of physical movements.
Consistency in word usage is important for effective instructional communication. The use of several different terms for the same behavior could confuse the child. For example, one can call an overhand throw a baseball throw; the term jump can mean many behaviors, such as from one foot to the other foot, from one foot to two feet, from two feet to two feet, or from one foot to the same foot. The term to use is that which is most correct—specifically the one used in textbooks or most commonly in the vocabulary of physical educators. In this case, overhand throw is a more commonly accepted term than baseball throw. In order to become meaningful to children with extremely limited vision, use these terms consistently to avoid confusion (Lieberman et al., 2013).
Shortening the verbal instructions to verbal cues will help guide the child as well as keep his movements consistent and on task. Verbal cues must be precise, clear, and free of additional words. For example, if you want a child to bring both arms back for the standing long jump, you would say, "Swing arms down and back with hands behind buttocks and arms straight," so the child knows you mean down and back as opposed to over the head and back. If a child is deafblind, the use of sign or tactile explanation prior to using touch cues is appropriate.
Task analysis
Verbal language is not sufficient to teach children with no previous experience or with limited basic skills about complex physical movements, such as hopping, skipping, or throwing. Task analysis (also known as activity analysis) is the breakdown of all the steps necessary to perform a given task. (Lieberman & Houston-Wilson, 2009). Task analysis is a powerful tool of instruction for those with visual impairments who need to learn basic physical skills. The use of task analysis allows a child to learn and master skills through a series of smaller steps until the entire skill is learned.
Figure 2-4a.A task analysis to teach the underhand roll: Photo:A teacher tactile models a lunge for a child. Figure 2-4b.A task analysis to teach the underhand roll: Photo: The child performs a lunge with his back knee touching a small, bendable cone. Figure 2-4c.A task analysis to teach the underhand roll: Photo: The child holds a ball with his arm extended backward until it touches the teacher's hand. Figure 2-4d.A task analysis to teach the underhand roll: Photo: The child performs an underhand roll independently. Figure 2-4e.A task analysis to teach the underhand roll: Photo: The child performs a mastered, underhand roll while he plays goalball.
Teaching the underhand roll may be a matter of using the appropriate cues: step (opposite foot), arm back, step, step (opposite foot), bend knees, roll, and follow through. It is important to use these verbal cues coupled with the teaching techniques of tactile modeling and physical guidance. See Appendix A for cues for each gross motor skill in this curriculum.
Tactile teaching
In most cases with children who have low levels of vision, it is best to use verbal instruction accompanied with tactile teaching. Verbal instruction alone may take a long time and leave the instructor and child frustrated. It is also not as likely to produce the correct form of the skill (O'Connell, Lieberman, & Petersen, 2006). The methods discussed here are tactile modeling, coactive movement, and physical guidance. Use these three instructional techniques to teach children with visual impairments who may not be able to see a demonstration. Use these techniques to make the demonstration of complex physical skills accessible to children who are visually impaired.
Figure 2-5a.Shows a combination of tactile teaching techniques to teach the motor skill jump: Photo: A teacher tactile models jumping on a mini trampoline while the child feels the teacher's hand and thigh move up and down. Figure 2-5b.Shows a combination of tactile teaching techniques to teach the motor skill jump: Photo: The teacher and child hold hands and coactively jump on the mini trampoline together. Figure 2-5c.Shows a combination of tactile teaching techniques to teach the motor skill jump: Photo: The teacher provides verbal instruction and physical guidance while she holds the child's hand as the child jumps alone on the mini trampoline. Figure 2-5d.Shows a combination of tactile teaching techniques to teach the motor skill jump: Photo: The child holds the teacher's hand and jumps from the mini trampoline onto a floor mat.
Tactile modeling.
In this context, tactile modeling means an adapted demonstration—in other words, an exhibition of a motor skill presented tactilely (the child feels the instructor or a peer executing the movement) to make it accessible to children with visual impairments. Tactile modeling can be a demonstration presented to children who are blind through a tactile demonstration (child feels instructor or a peer) that also increases the visibility of an activity for those who have low vision (O'Connell et al., 2006).
Tactile modeling is a common tool used to teach the component parts in the task analysis and is effective for activities such as yoga, shot put, goalball offense and defense, swimming, and many others. During tactile modeling, the child touches or observes a model (teacher, aide, or peer) who demonstrates a skill.
Figure 2-6a.Tactile modeling to teach a modified arabesque pose (balance) on a low balance beam: Photo: A teacher physically supports a peer who stands on one leg with the other leg extended backward; her arms extend sideways. A child feels the peer's leg and arm positions. Figure 2-6b.Tactile modeling to teach a modified arabesque pose (balance) on a low balance beam: Photo: The child performs the balance position independently on the low balance beam. Figure 2-7. Photo: A child lies prone on a mat on the pool deck with his arms extended out to the water. He feels a peer swim across—over and under his arms.
Coactive movement.
In many instances, a child will comprehend a skill much better when feeling the instructor perform the movements. This works best when the child is smaller than the instructor, paraeducator, or peer. In coactive movement, position the child so that his moving body part touches the instructor's same moving body part. This is similar to tactile modeling, although the entire body part moves as opposed to parts of the body and the child goes through the motion at the same time as the instructor. See examples in Table 3: Examples of Coactive Movement.
The disparity of size between an adult's arms and legs to that of a small child may make peer tactile teaching a good option for some children.
Figure 2-8a.Tactile teaching: Photo: An adult and child lie prone, side-by-side on scooters; the child's right hand is on top of the adult's left hand. They coactively move their arms. The child must stretch uncomfortably to match the adult's arm movement. Figure 2-8b.Tactile teaching: Photo: Two peers are prone, side-by-side on scooters; they move their arms comfortably in unison.
Table 3 Examples of Coactive Movement
Skill
Position
Cue
Slide
1. The child and instructor stand on carpet squares facing each other; the tips of their shoes touch each other's; they hold hands while the instructor slides feet. 2. The child and instructor hold hands while both slide their feet on the floor. 3. The child executes the slide independently.
"Step-together-step"
Push-up
1. The child lies on the instructor's back with his arms on the instructor's arms.* 2. The child feels the elbows bend and straighten and feels their bodies move up and down.
"Up-down, up-down"
Weight shift for throwing or batting
1. The child stands behind the instructor or peer and puts his hands on the instructor's hips.* 2. Instructor moves forward and back.
"Shift forward, back, shift forward, back"
* Check school district regulations. Certain coactive movements may require a peer or family member to move coactively with the student.
Figure 2-9a.Pre-teaching the slide beginning with coactive movement: Photo: A teacher and child face each other, toes touching, and slide coactively on carpet squares. Figure 2-9b.Pre-teaching the slide beginning with coactive movement: Photo: The child slides along the wall mimicking Spider-Man®; her heels stay in contact with the wall. Figure 2-9c.Pre-teaching the slide beginning with coactive movement: Photo: The child practices the slide on a guidewire as her teacher provides verbal instruction. Figure 2-9d.Pre-teaching the slide beginning with coactive movement: Photo: The child lines up with her classmates to slide during physical education class. She will use her guidewire to slide independently.
An entire class can participate in coactive movement by performing activities in pairs. This allows the child with visual impairment to participate without "feeling different" or doing something different from his classmates. For example, students can dance the "Cupid Shuffle" shoulder to shoulder.
Figure 2-10. Photo: Students are in pairs, touching shoulder-to-shoulder, ready to dance.
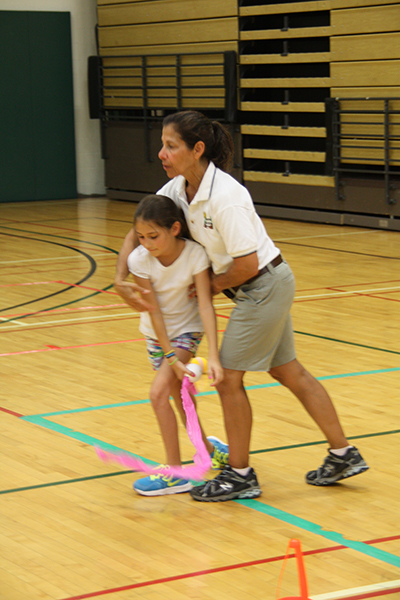
Physical guidance.
By contrast, physical guidance involves manipulation of the child; the instructor, aide, or peer actively touches and moves the child in some way. Physical guidance is an important component of the instructor's lesson; there are some physical activities for which physical guidance is the ideal teaching technique and is useful for improving performance (Tsutsui, & Imanaka, 2003). Please remember to couple physical guidance with a verbal explanation (or signs for children who have a dual sensory impairment).
Figure 2-11a. Photo: Peer physical guidance to hop: A peer kneels to adjust her classmate's leg so it is properly bent. Figure 2-11b. Photo: Peer physical guidance to hop: The peer stands to adjust her classmate's shoulder so it remains level while the elbow is bent. The classmate holds the wall for support.
When using physical guidance, it is imperative to discuss its use with the child before doing so. People with blindness are often sensitive to being touched or to being urged along by an arm or elbow. Indeed, one of the first principles to guiding a person who is blind is to never push or grab that person. This sensitivity to being pushed is not unique to people with visual impairments, but is broadly human in nature and probably stems from a need for the locus of control to remain within each of us (Lieberman et al., 2013). This is noteworthy in a discussion of instructional modification in physical education because many individuals with a visual impairment react to physical manipulation with a degree of emotion that can become a barrier to learning. Thus, physical guidance can be appropriate and effective, but the child must understand that he can ask the instructor to use tactile modeling if preferred. When teaching physical skills to individuals who have no significant intellectual or cognitive difficulties, the general rule is to consider tactile modeling first, and then move to physical guidance if that is a preferred method for the child. The child should have the choice, but the instructor can also assess what method is easiest and most appropriate for a particular skill or activity.
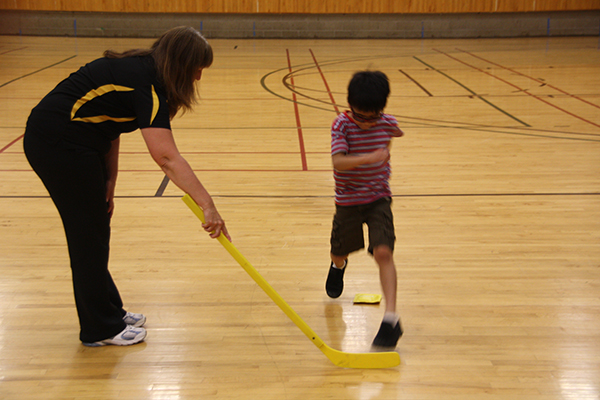
Figure 2-12. Photo: A coach physically guides a child's arm and bat to a beeping ball on a batting tee.
Teaching children who have deafblindness
The methods to surmount communication barriers between teacher and child as well as the instructional methods described thus far in this chapter also apply to children who have both a visual impairment and hearing loss. However, children who are deafblind face the additional difficulty of the loss of verbal communication from instructor to child. Therefore, teachers of children with dual sensory impairments must be aware of alternative communication methods and systems that their children might use.
Hearing losses can range widely from mild hearing loss to deafness. Likewise, there are various combinations of vision and hearing among people who are deafblind. However, while some people who are deafblind are able to use augmented verbal communications, the instructional modifications described here are aimed primarily at those whose hearing losses are severe enough to require manual communication systems. Some children who are deafblind are able to respond verbally to instructors (that is, with expressive language), so the barriers to communication may relate only to information from the instructor to the child. In that event, the child can explain what he already knows about the activity, but may need the aid of an interpreter/intervener to receive explanations (that is, to overcome a barrier to receptive language).
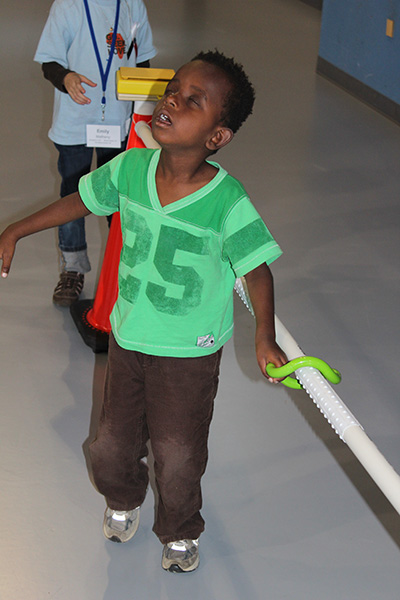
Figure 2-13a. Photo: Pre-teaching a child who has deafblindness to kick: A teacher signs verbal instructions. Figure 2-13b. Photo: Pre-teaching a child who has deafblindness to kick: The child sits in a chair and kicks the ball. Figure 2-13c. Photo: Pre-teaching a child who has deafblindness to kick: The child stands and kicks the ball.
Teach children in the method from which they learn the best (Best, Lieberman, & Arndt, 2002; Liberman et al., 2013). Before starting to work with a child who is deafblind, it is important to discover the child's preferred method(s) of communication. The physical education teacher can consult with other members of the child's educational team, such as his teacher of children with visual impairment, a sign language interpreter, or an intervener.
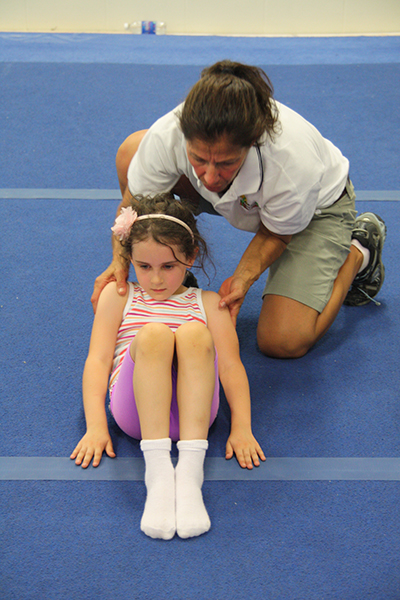
Photos: A boy catches a ball, a teacher prepares a boy to perform a kick while sitting in a chair, and a girl performs a curl-up.
Part II Teaching Gross Motor Skills
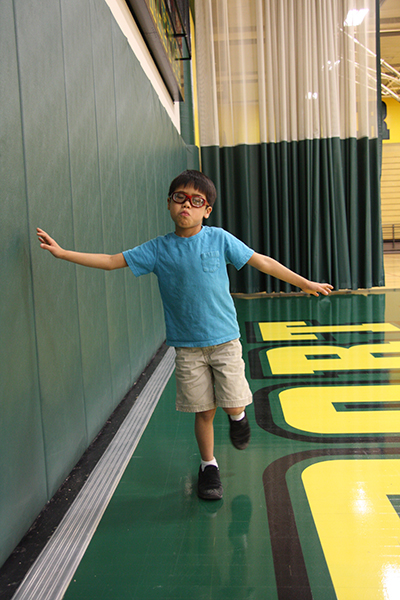
Photo: A child with a visual impairment hops across the gym floor with his classmates. He hops straight with the aid of bright, tactile lines on the floor.
Chapter 3: Refinement
Photo: A child—with his knees bent—prepares to hop into a hoop lying on the floor.
The Gross Motor Development Curriculum for Children With Visual Impairments helps you teach lead-in activities, perceptual motor skills, locomotor skills, object control skills, and physical fitness skills to students who have visual impairment or blindness. Teach each skill using the whole-part-whole approach. Once you determine which skills a student needs to refine, discuss the whole-part-whole approach for each skill with the student. If a specific teaching technique is needed for parts of the following skills, it is described under each specific skill.
Whole-Part-Whole
Generally, the teacher should begin to teach the whole skill by demonstrating the skill in the child's field of vision while explaining the motions verbally. A child who uses a monocular can watch a coach or peer run from a distance to learn the synchronization of the arms and legs and to see the fluid, rhythmic motion of the movement.
Figure 3-1a.Using a monocular: Photo: A close-up shows a child using a monocular. Figure 3-1b.Using a monocular: Photo: The child looks down the track to see a runner in the distance.
Another option is to have a young peer demonstrate the skill while the teacher describes the movement. For example, if the skill is a jump, the peer performs the movement while the teacher says, "Bend knees, arms back, swing arms to front, jump forward, and land on both feet."
Figure 3-2. Photo: A child feels a peer's bent knee while the teacher provides verbal instruction.
Whole-Part-Whole
Once the child understands the general skill, break the skill down into its component parts. Teach each part with either physical guidance (move the child through the motions), and/or tactile modeling (the child feels the teacher/peer doing the motions). Use clear verbal instructions and cues.
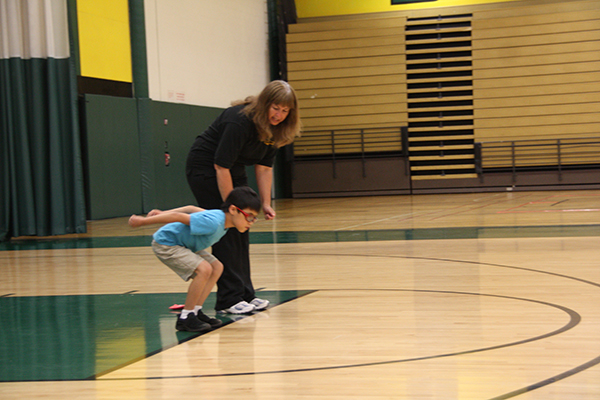
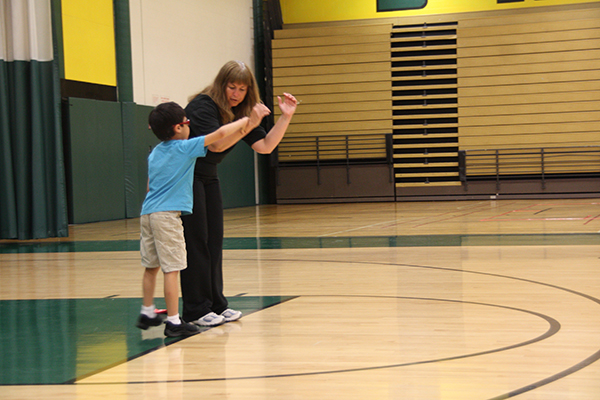
Figure 3-3a.A coach teaches running: Photo: A coach instructs a child to make fists. Figure 3-3b.A coach teaches running: Photo: The coach uses physical guidance to position the child's feet. Figure 3-3c.A coach teaches running: Photo: The coach uses physical guidance to instruct arm movement. Figure 3-3d.A coach teaches running: Photo: The coach adjusts the child's knee for proper one foot landing.
Determine to use tactile modeling or physical guidance by the type of skill, the child's level of experience, size of the instructor or peer, and comfort level of the child (Cieslak, Lieberman, Haibach, & Houston-Wilson, 2015). For example, if the teacher is much larger than the child and a peer is not available, use physical guidance. If a child has performed the skill before and just needs a prompt to execute the skill, minor physical guidance, such as a touch of the knee for a jump, is appropriate.
Whole-Part-Whole
Once the child has practiced the whole skill and subsequently refined the skill by executing each part, then the child can put the parts together to perform the whole skill. It might help to accompany each step with a cue. For example: The child observes a peer strike a ball and hears the words, "Feet parallel, grip, arm back, bend knees, shift weight to back leg, step forward and swing, follow through."
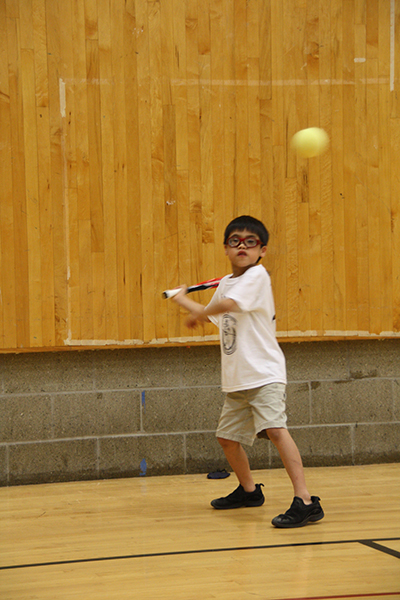
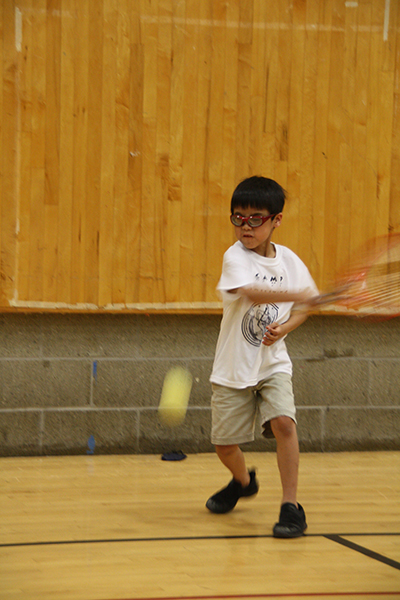
Figure 3-4a.Tennis strike: Photo: A boy stands with his feet parallel, arm back, knees bent, and weight shifted to back leg. Figure 3-4b.Tennis strike: Photo: The boy has his weight on his front leg; his arm swings, the ball flies, and his arm is across his midline for follow through.
Another example: The child observes a peer catch a ball and hears the words, "Hands out, palms up, catch, grip." The child then practices the task-analyzed skill and each part with physical guidance and tactile modeling until she performs each part. Then the child puts the whole skill together along with cues.
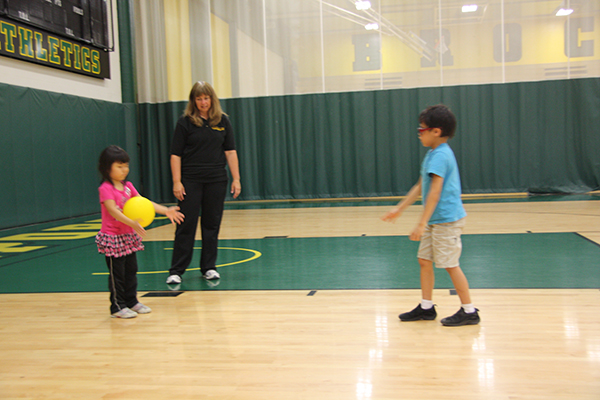
Figure 3-5. Photo: A child throws a ball to another child who has her hands out and palms up. The ball lands in her arms, ready for her to catch and grip.
If the child needs further refinement, then she can break down the skill and practice the parts that need improvement before performing the skill in its entirety. There is no specific time for each part of the process. It is important to keep in mind that children with visual impairments can perform motor skills as well as their peers with sight—they just need to be given the opportunity and time.
Chapter 4: Teaching Perceptual Motor Skills
Photo: A girl balances precariously on one foot with her eyes closed.
Perceptual motor development engages children in movement activities that integrate perception and movement; it uses movement activities to enhance academic and cognitive skills. Usually the development of perceptual motor skills evolves in children between 2½ to 6 years old. As stated in the introduction, children with visual impairment develop motor skills more slowly than peers with sight. Balance is a perceptual motor skill that is vital for successful performance in all motor skills. Short-term dynamic balance interventions have been found to improve balance significantly in children with visual impairments (Jazi, Purrajabi, Movahedi, & Jalali, 2012), which can have positive effects upon the acquisition of fundamental and sport-specific motor skills as well as reduce the individual's risk for falling. For this reason, the authors chose to present balance prior to teaching locomotor and object control skills, and physical fitness skills.
To teach and practice balance, and to record progress for a possible Individualized Education Program (IEP) goal, use the practice grid in Appendix C. For an actual assessment, use the scoring record provided with your chosen assessment tool.
Skill: Balance
Figure 4-1. Photo: A child stands perpendicular to the wall on one leg with his arms laterally extended at shoulder height.
Description: Child stands—with eyes closed—on one foot and then the other foot.
Materials: Clear space and stopwatch
Directions: When child performs barefoot, wipe the floor area with a disinfectant before each child begins; wearing tennis shoes is acceptable. Practice using a watch with a second hand or a stopwatch when the chosen assessment tool requires timing. Determine the child's preferred foot. Stand close to the child for support in case he starts to fall. Tell the child to close his eyes (if there is usable vision), to lift his nonpreferred foot about 6 inches from the ground, and to hold the position for as long as possible. Stop timing if the raised foot begins to lower or touches the ground, and if the child begins to sway or opens his eyes. Repeat with the preferred foot.
Task Analysis/Practice:
Stands with feet together and parallel.
Closes eyes.
Lifts arms out to sides at shoulder height. Optional: Lightly hold the child's hand until balance is steady or let child lightly touch wall. Eventually eliminate support.
Lifts one foot off the floor about 6 inches, knee bent at a 45-degree angle.
Holds position for as long as possible.
Teaching Modifications and Adaptations:
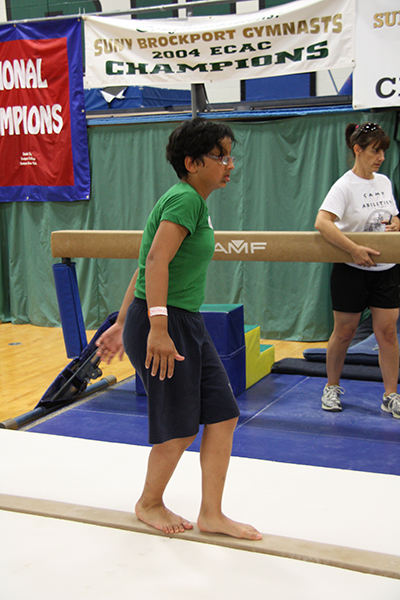
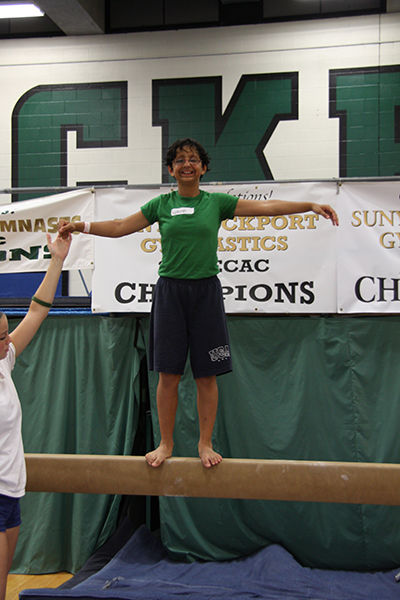
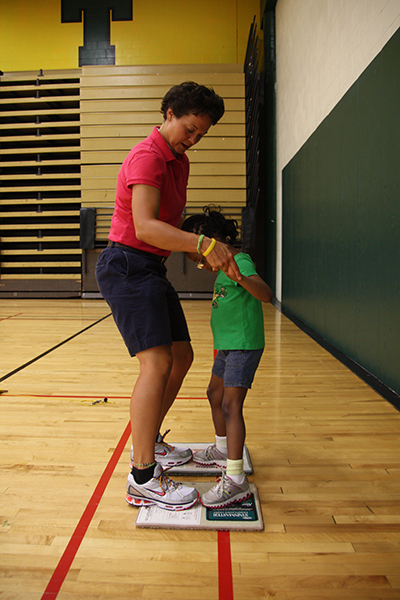
Use a low balance beam with foam pads on both sides.
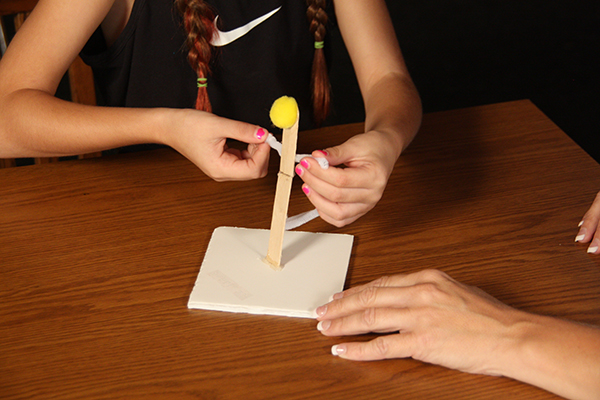
Use a tactile model/figure to demonstrate different balance positions.
Figure 4-2a.Balancing on a gymnastics balance beam: Photo: A girl balances on a low balance beam in walking position. The floor is built up to beam level with foam pads. Figure 4-2b.Balancing on a gymnastics balance beam: Photo: The same girl stands on a balance beam in the slide position. Her teacher offers support with a light hand touch. Figure 4-3. Photo: Hands explore a tactile model made of pipe cleaners, cotton balls, and wood. The model shows a modified arabesque pose (balancing on one leg with the other leg extended backward).
Chapter 5: Teaching Locomotor Skills
Photo: Brother and sister run along opposite sides of a guidebar; each holds the ring that slides down the guidebar.
Locomotor skills are motor skills in which the feet move the body from one place to another. Most children with sight learn to walk at approximately age 1, and to run, hop, and jump at age 2. They begin to master galloping, skipping, sliding, and leaping at about age 3. All children, regardless of sight, need some instruction to learn these skills. Ample opportunities to practice these skills are vital for children who have a visual impairment. The locomotor skills (minus walking) presented on the following pages are roughly in order of how children learn them.
To teach and practice a locomotor skill, and to record progress for a possible Individualized Education Program (IEP) goal, use the Practice Record in Appendix C. For actual assessments, use the scoring record provided with your chosen assessment tool.
Skill: Run
Description: Child runs as fast as possible from one cone to the other (toward the beeping sound).
Optional: 65-foot guidewire, two game standards, 12-inch loop rope, carabiner
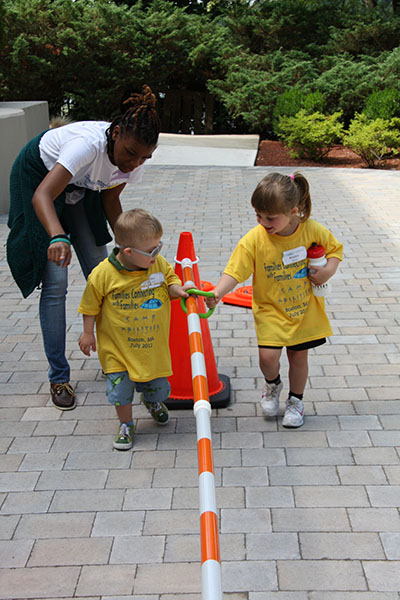
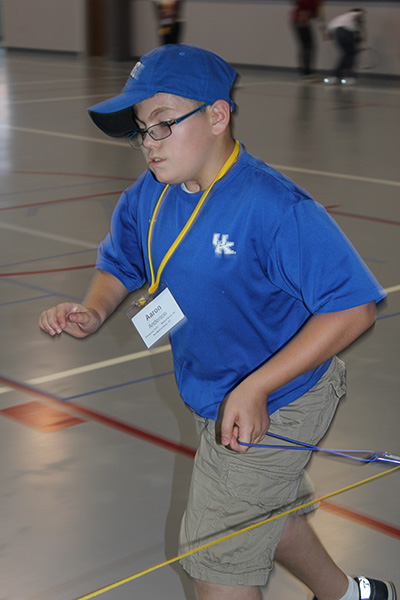
Figure 5-1. Photo: A child with visual impairment runs using adapted equipment: a guidewire, carabiner, and looped rope. She runs toward her teacher who is clapping to provide her direction and distance information.
Directions: Position two cones 50 feet apart and make sure there is at least 8 to 10 feet of clear space beyond the second cone for a safe stopping distance. Place the portable sound source at the far cone. Provide a "set, go" start. Repeat and practice as needed. If using a guidewire, tie the guidewire to two multipurpose game standards. Place a knot at 50 feet so the carabiner catches on it and the runner still has 5 feet of guidewire to stop before hitting a standard.
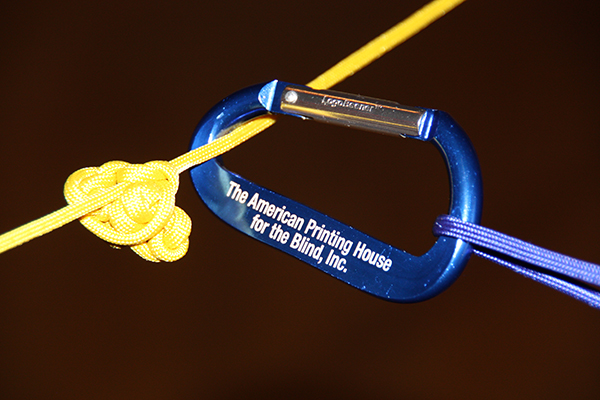
Figure 5-2. Photo: Detail of a knotted guidewire, carabiner, and looped rope.
Task Analysis/Practice:
Keeps elbows bent.
Moves arms back and forth from shoulders—without crossing midline—in opposition to legs.
Figure 5-3. Photo: Teacher uses physical guidance to instruct a child how to maintain shoulder position and use proper arm movement when he runs.
Nonsupport leg bent approximately 90 degrees and support foot lands directly underneath the body with knee slightly bent.
Both feet are off the ground for a short period of time.
Foot hits the ground lightly—landing between heel and midfoot—then quickly rolls forward (i.e., not flat footed).
Thinks tall and keeps head straight and level.
Figure 5-4. Photo: A teacher instructs a child on how to place his foot and bend his knee on the support leg while running.
Teaching Modifications and Adaptations:
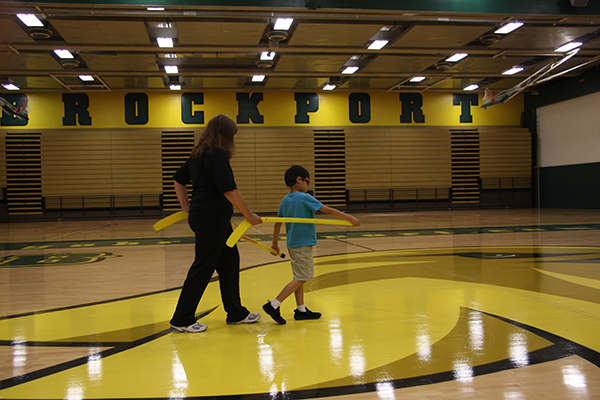
Arm swing: The teacher stands behind the child with two hockey sticks or broom sticks in each hand. Move the sticks back and forth in a swinging motion while standing. When the child understands this movement, then walk while swinging the arms. Once this is correct, run while swinging the sticks and therefore the arms.
Figure 5-5. Photo: A teacher holds the back end of two plastic hockey sticks—one in each hand—while a child holds the front ends. They walk in unison with arm movements in opposition to leg movements.
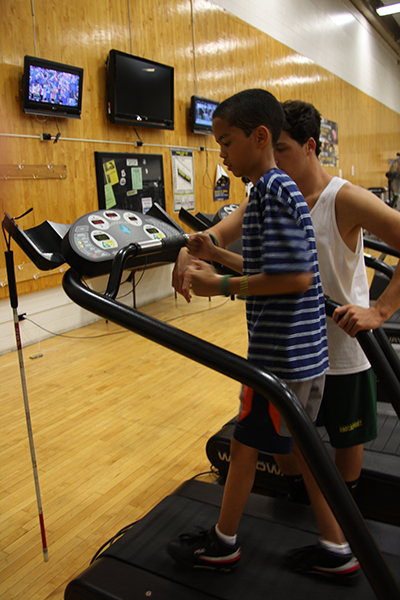
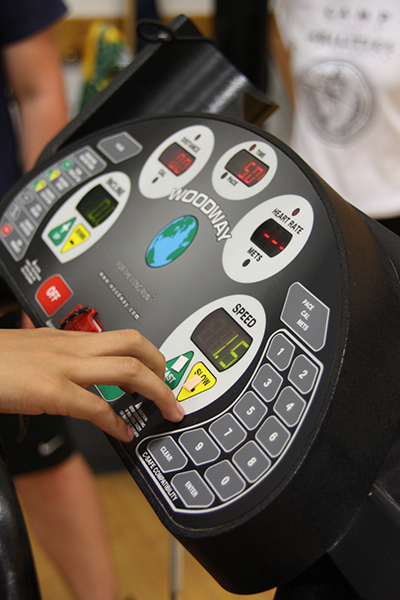
Treadmill: Running on a treadmill gives the instructor an opportunity to give physical guidance during the run to correct any biomechanical errors. Treadmill running may also provide the student an opportunity to observe running form—tactually feel arm position and swinging motion, knee lift, and so forth. Treadmills offer an opportunity for the child to hear the rhythm of running. For more independent operation, place tactile markers on the treadmill controls. It is good practice to reduce the treadmill speed as needed and to provide task analysis before showing form on the treadmill.
Figure 5-6a.Treadmill: Photo: A teacher tactile models running on a treadmill while a child holds his hand in a position to feel the teacher's arm swing back and forth rhythmically. Figure 5-6b.Treadmill: Photo: A child practices running on a treadmill; he alternates tapping his knuckles to the front bar. Figure 5-6c.Treadmill: Photo: Two different tactile markers are attached to a treadmill's speed controls.
For additional ideas on teaching running techniques, see the following resource: Samalot-Rivera, A., Liberman, L. J., & Haibach, P. (2015). Teaching two critical locomotor skills to children who are blind or have low vision. Journal of Visual Impairment & Blindness, 109, 148-153.
Skill: Hop
Description: Child hops on one foot consecutive times and then hops on other foot.
Materials: Clear space
Directions: Determine the child's preferred foot. Tell her to hop on the preferred foot and then 3 times on the other foot. Repeat and practice as needed.
Task Analysis/Practice
Optional: Lightly hold the child's hand until balance is steady. Eventually eliminate this step.
Bends nonsupport leg and lets it swing forward and backward to produce force.
Foot of nonsupport leg remains behind body and swings backward.
Flexes arms and swings them for balance and to produce force.
Jumps up and lands on same foot consecutive times as required by assessment tool.
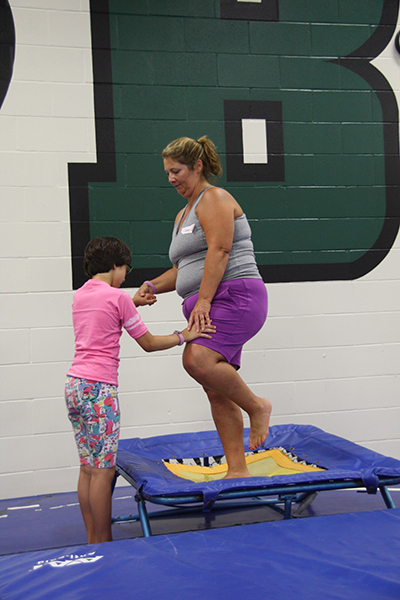
Teaching Modifications and Adaptations: Use a mini trampoline and transfer skill to floor. Always surround trampolines with floor mats.
Figure 5-8a.Hopping on mini trampoline: Photo: A teacher tactile models hopping. A child holds one of the teacher's hands and rests her other hand on the teacher's raised leg; the child feels the up/down motion of hopping on one leg. Figure 5-8b.Hopping on mini trampoline: Photo: The child hops independently on the mini trampoline with her arms extended to her sides at shoulder height. Her teacher stands nearby, ready to offer support.
Skill: Horizontal jump
Description: Child jumps forward.
Materials:
10 feet of clear space
Florescent tape
Task Analysis/Practice:
Bends knees and hips; extends arms behind the body.
Figure 5-9a.Horizontal jump: Photo: A teacher gives verbal instructions as a child stands behind a line with his knees and hips bent and his arms extended behind his body. Figure 5-9b.Horizontal jump: Photo: A teacher uses tactile modeling to show the child how to extend his arms above his head.
Swings arms forward forcefully and upward to full extension above the head.
Jumps forward with both feet and lands on both feet simultaneously; bends knees to absorb the force of the landing.
Thrusts arms downward during landing.
Teaching Modifications and Adaptations:
Use a mini trampoline and transfer skill to floor.
In a pool, use an aqua aerobic step or a submersible step stool and begin small jumps to the pool floor. Transfer skill to pool deck.
Figure 5-10a.Jumping into the water: Photo: A child stands on a stool in the shallow end of the pool. He prepares to jump to the pool floor while being given verbal instruction. Figure 5-10b.Jumping into the water: Photo: Same child stands along the edge of the pool deck with his classmates. They all prepare to jump into the water with knees bent and arms extended backward.
Cue: Say, "Bend knees, arms back, jump forward, thrust arms to front, land on two feet, and bring arms down."
Skill: Skip
Description: Child skips from one cone to the other (toward the beeping sound).
Optional: 35-foot guidewire, two game standards, 12-inch loop rope, carabiner
Directions: Position two cones 25 feet apart and make sure there is at least 10 feet of clear space beyond the second cone for a safe stopping distance. Place the portable sound source at the far cone. Provide a "set, go" start. Repeat and practice as needed. If using a guidewire, place a knot at 25 feet so the carabiner catches on it and the runner still has 10 feet of guidewire to stop.
Task Analysis/Practice:
Bends arms and lifts to waist level.
Steps forward with the lead foot. With lead foot in the air, hops on opposite foot; continues this pattern changing lead foot each time.
Brief period where both feet are off the ground between each cycle.
Maintains a rhythmic pattern for a determined number of consecutive skips.
Figure 5-11a.Skip: Photo: A teen picks up the rhythm of her coach as they skip coactively. Figure 5-11b.Skip: Photo: A young boy lifts his right knee to touch tambourines made from plates and jingle bells that he holds in his hands. His elbows are bent 90 degrees.
Teaching Modifications and Adaptations:
Have the student listen to the rhythm of the skip to understand the step sequence.
Sighted guide provides "physical rhythm" or cadence through coactive movement.
Cue: Say, "Step forward-hop, step forward-hop."
Skill: Gallop
Description: Child gallops from one cone to the other (toward the beeping sound).
Optional: 30-foot guidewire, two game standards, 12-inch loop rope, carabiner
Directions: Position two cones 25 feet apart and make sure there is at least 10 feet of clear space beyond the second cone for a safe stopping distance. Place the portable sound source at the far cone. Provide a "set, go" start. Repeat and practice as needed. If using a guidewire, place a knot at 25 feet so the carabiner catches on it and the runner still has 10 feet of guidewire to stop.
Task Analysis/Practice:
Bends arms and lifts to waist level.
Steps forward with the lead foot; steps the trailing foot forward adjacent to or behind the lead foot. The lead foot always remains in front, and the back foot comes up to meet but never passes the front foot.
Brief period where both feet are off the ground.
Maintains a rhythmic pattern for a determined number of consecutive gallops.
Figure 5-12a.Gallop: Photo: A child extends his lead foot to begin the gallop. Figure 5-12b.Gallop: Photo: The child's trailing foot lifts to meet his lead foot. For a second, both feet are off the ground.
Teaching Modifications and Adaptations:
Have the student listen to the rhythm of the gallop to understand the step sequence.
Sighted guide provides "physical rhythm" or cadence.
Figure 5-13. Photo: A coach uses physical guidance to position the toe of a child's trailing foot to meet the heel of his lead foot.
Cue: Say, "Step right foot forward-step left foot together, right foot forward-left together, right forward-together, forward-together."
Skill: Slide
Description: Child slides from one cone to the other, and back again for more practice.
Materials:
25 feet of clear space
Two cones
Florescent tape
Directions: Position the cones 25 feet apart along the tapeline. The child starts at one cone and slides along the line to the other cone.
Task Analysis/Practice:
Stands on the tapeline so shoulders are aligned with the line.
Steps sideways with lead foot and then slides the trailing foot to meet the lead foot—instep to instep.
Practices continuous step-slide cycles to the right.
Practices continuous step-slide cycles to the left.
Teaching Modifications and Adaptations:
For initial whole-part-whole, have the child remove shoes to feel tactile line (if needed).
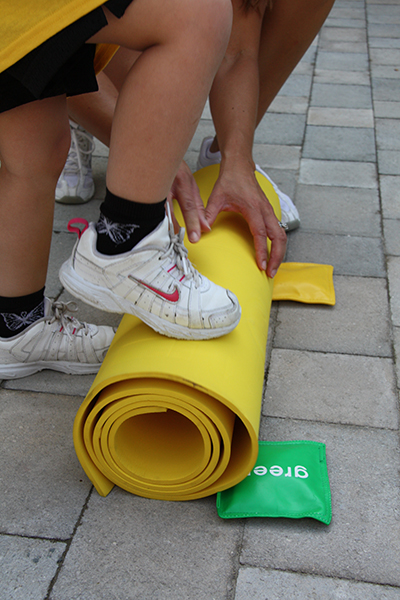
Figure 5-14a.The slide: Photo: A child does the "Spider-Man®" walk, keeping heels in contact with the wall. Figure 5-14b.The slide: Photo: The child and her teacher slide on carpet squares coactively. Figure 5-14c.The slide: Photo: The child slides with her hands on a guidewire as her teacher gives verbal instruction. Figure 5-14d.The slide: Photo: A child slides with her feet between two rectangular prisms of foam taped to the floor.
For more ideas on improving the form of the slide, see the following resource: Samalot-Rivera, A., Lieberman, L. J., & Haibach, P. (2015). Teaching two critical locomotor skills to children who are blind or have low vision. Journal of Visual Impairment & Blindness, 109, 148-153.
Skill: Leap
Description: Child leaps over a small beanbag.
Materials:
20 feet of clear space
Brightly colored beanbag
Florescent tape
Directions: Attach a piece of tape to the floor. Place a beanbag 10 feet from and parallel to the tape. The child stands on the tape and runs to the beanbag and leaps over it. If child has little or no usable sight, tap a cane on the floor next to the beanbag as a directional cue. Just before the child arrives at the beanbag, quickly remove the cane and shout, "Leap!"
Task Analysis/Practice:
Starts with a large step and progresses to pushing off the back foot while landing on the opposite foot.
Advances to take off on one foot and land on the opposite foot.
Make sure both feet are off the ground for a short period.
Reaches forward with the arm opposite the lead foot.
Figure 5-15a.Leap: Photo: A teacher and child practice stepping forward to push off and leap over a mat. Figure 5-15b.Leap: Photo: A teacher taps the floor with a plastic hockey stick, and a child leaps over a beanbag. Figure 5-16a.Leap adaptation: Photo: A child drags her toe up and over a rolled up yoga mat. Figure 5-16b.Leap adaptation: Photo: The child's foot touches the ground on the far side of the yoga mat.
Teaching Modifications and Adaptations: To teach a child to lift the toes up high and forward, roll up a towel or yoga mat and place it on the floor. Demonstrate how to drag and lift a foot up and over the roll, dragging the toes over the roll. Provide verbal guidance and have the child practice the action.
Cue: Tap cane to start and say, "Leap!"
Chapter 6: Teaching Object Control Skills
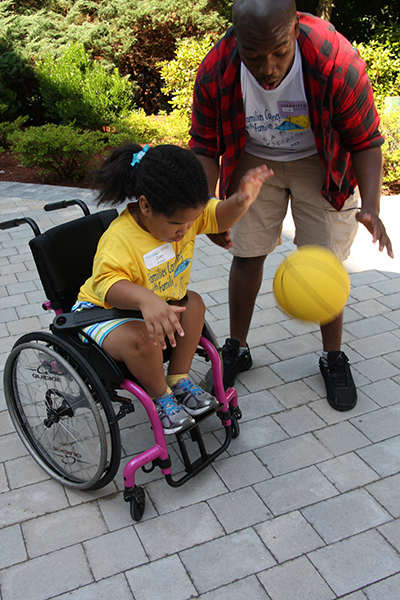
Photo: A girl in a wheelchair dribbles a bright yellow basketball. Her coach offers support.
Object control skills are motor skills that involve an object. Outside of the gym, object control skills are sometimes referred to as manipulative skills. For small muscles, the object might be a pencil, button, or jewelry. For large muscles, the object might be equipment such as bats, balls, racquets, golf clubs, or hockey sticks.
When one teaches these skills, it is important to remember that a child's goal is not complete accuracy (e.g., throwing a ball at a target). Children need to learn and begin to master the action. For a child with a visual impairment, it can be helpful to use sound adapted equipment and tactile teaching as described earlier.
To teach and practice a locomotor skill, and to record progress for a possible Individualized Education Program (IEP) goal, use the Practice Record in Appendix C. For actual assessments, use the scoring record provided with your chosen assessment tool.
Skill: Two-hand strike/bat
Description: Child hits a ball (on a batting tee). If the child has enough vision to see the ball, teach and practice the skill using a traditional ball and bat or a plastic ball and bat as recommended by your chosen assessment tool. For a child with low vision, use a bright color ball or paint the ball if needed. For children with no usable vision, use a continuous, sound emitting ball with an aluminum bat.
Materials:
Clear space (outdoors or gym)
Sound emitting t-ball, baseball, or softball
Aluminum bat
T-stand
Optional: Commercially available balls and bats (See Description.)
Directions: Adjust the batting tee so the top is level with the child's waist. Place the sound emitting ball on the batting tee. Tell the child to swing at the sound and hit the ball hard.
Task Analysis/Practice:
Turns body sideways with nondominant shoulder facing the direction the child is batting; child should hear the ball predominately in ear above nondominant shoulder.
Positions feet parallel and slightly more than shoulder width apart, with weight evenly distributed on both feet.
Grips bat with dominant hand above nondominant hand.
Brings bat up to dominant shoulder and holds even with or slightly above the shoulder.
Slightly bends knees with elbows down.
Shifts weight onto back leg.
Steps forward as arms swing.
Sequential rotation of hips and shoulders.
Hits ball.
Follows through across body.
Teaching Modifications and Adaptations:
Begin by attaching a balloon to the edge of a table and have the child sweep the edge of his palm along the table to hit the balloon. Then add a small ball to hit across the table into the balloon. Next, hit the ball with a plastic or wooden bowling pin. Remove the balloon when the child is comfortable hitting just the ball. Leave the table and transfer skill to a batting tee with a bat.
Figure 6-1a.Batting: Photo: A girl slides the edge of her palm across a table and hits a ball into a balloon. Figure 6-1b.Batting: Photo: The girl slides a plastic bowling pin across a table to hit the ball. Figure 6-1c.Batting: Photo: The girl uses a wooden bowling pin to hit the ball off the table. Figure 6-1d.Batting: Photo: The girl—with physical guidance from her teacher—holds a bat ready to hit a beeping ball from a batting tee.
Skill: One-hand forehand strike
Description: Child strikes a self-bounced ball with a paddle (Ulrich, 2014). If the child has enough vision to see the ball, teach and practice the skill using a traditional tennis ball and plastic paddle as recommended by your chosen assessment tool. For a child with low vision, use a bright color ball. For children with no usable vision, use a sound emitting ball.
Materials:
Clear space with a wall
Auditory ball (e.g., APH 30-Love tennis ball)
Plastic paddle
Optional: Commercially available balls and paddles (See Description.)
Directions: Provide a quiet space so child can hear auditory ball. Tell the child to hold the ball in nondominant hand and paddle in dominant hand. Stand with back to wall and clasp so child orients nondominant shoulder to wall. Tell the child to drop the ball to the floor with enough force that it comes waist high on the off bounce. Tell the child to swing at the sound and hit the ball toward the wall.
Task Analysis/Practice:
Turns body sideways with nondominant shoulder facing the wall.
Positions feet parallel and slightly more than shoulder width apart, with weight evenly distributed on both feet.
Grips paddle with dominant hand.
Slightly bends knees.
Holds ball up high and drops ball to floor.
Shifts weight onto back leg.
Steps forward as arm swings.
Sequential rotation of hips and shoulders.
Hits ball on the off bounce at waist height.
Follows through across the body.
Teaching Modifications and Adaptations:
Begin by attaching a balloon to the edge of a table and have the child sweep the edge of his palm along the table to hit the balloon. Then add a small ball to hit across the table into the balloon. Next, hit the ball with a plastic paddle. Remove the balloon when the child is comfortable hitting just the ball. Leave the table and transfer skill to floor with a self-bounced ball. If needed, practice using a batting tee with a two-hand strike and then a one-hand strike.
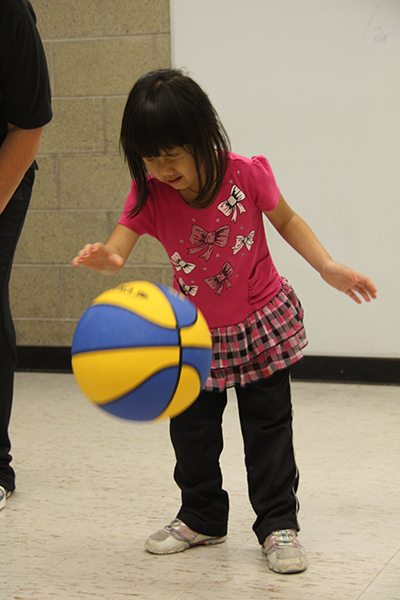
Skill: Stationary dribble
Description: Child dribbles a ball with one hand without moving his feet. A child with low vision may perform better with a bright color ball. A child with no usable vision may learn more quickly with a continuous sound emitting ball. Basketball players with mature dribbling skills run and dribble without watching the ball because the tactile sense takes over for visual reference.
Materials:
Intermediate/Women's basketball or sound emitting ball that bounces (approximately 28.5 inches)
Hard, flat surface
Task Analysis/Practice:
Bounces the ball on ground and contacts the ball with hand at belt level.
Pushes the ball with fingertips/finger pads (does not slap or strike with the palm).
Ball contacts floor in front of or to the outside of foot on the preferred side.
Controls the ball for consecutive bounces—as determined by assessment tool—without moving the feet to retrieve it.
Teaching Modifications and Adaptations:
Teach a child to tap his finger pads on a desktop or table. Transfer the tapping skill to a balloon ball on a string. Then introduce a small exercise ball. Transfer dribbling skill to an intermediate sized basketball.
Use music or clapping to practice and maintain timing.
Figure 6-2a. Photo: Stationary dribble: A teacher and child tap finger pads on a desktop. Figure 6-2b. Photo: Stationary dribble: The child taps a balloon ball. Figure 6-2c. Photo: Stationary dribble: The girl dribbles a small exercise ball. Figure 6-2d. Photo: Stationary dribble: The child dribbles a brightly colored basketball.
Skill: Catch
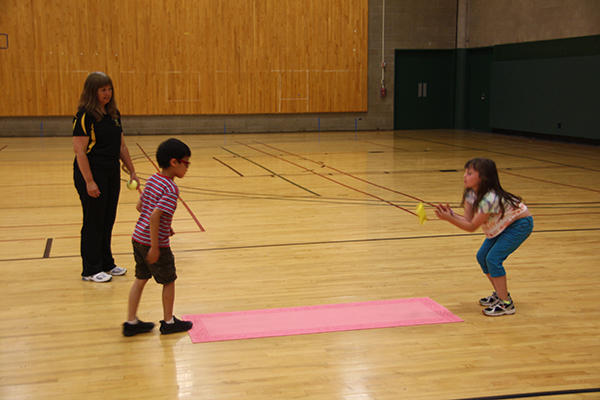
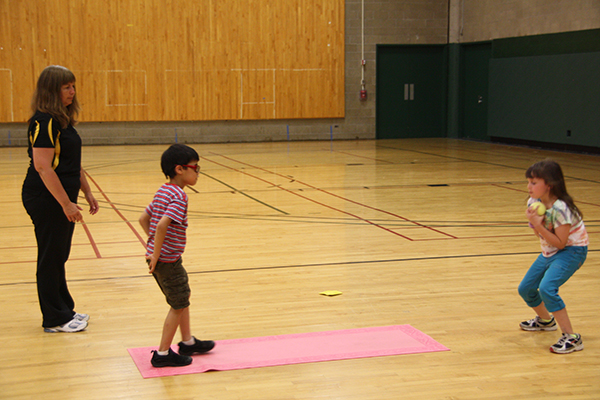
Description: Child catches a ball. Factors that affect how well a child catches a ball are size, color, velocity, trajectory angle, viewing time, and instruction. If a child has no usable vision, let him see the ball so the size is understood before instruction begins. Try to maintain the same velocity and trajectory angle with each practice throw. A verbal prompt may be needed at "catch" time. If needed, use a sound adapted ball. Place two lines of tape on the floor 15 feet apart. The catcher (child) stands on one line, and the peer or instructor who tosses the ball stands on the other. The peer or instructor throws the ball underhand with a slight arc at the child's chest. Tell the child to catch with both hands. Only count those tosses that are between the child's shoulder and belt. Repeat practice catches as needed.
Materials:
Ball (approximately 4 inches) (sound adapted)
15 feet of clear space
Florescent tape
Task Analysis/Practice:
Positions hands in front of the body with elbows flexed.
Places hands face up.
Extends arms while reaching for the ball as it arrives.
Adjusts arms and hands to ball flight characteristics; body position may need to adjust to ball as well.
Hands face each other; catches ball with the hands only.
Teaching Modifications and Adaptations:
Teach skills using a bigger ball and on a table and then transfer them to an open area.
Teach skills with a beanbag and then transfer to a ball.
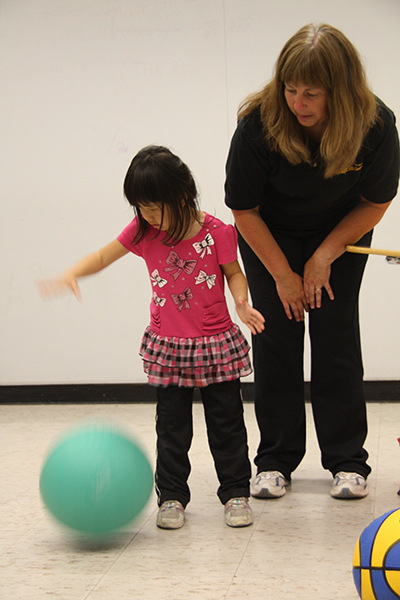
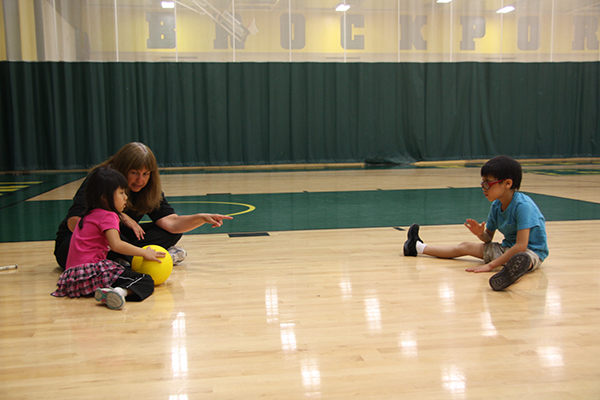
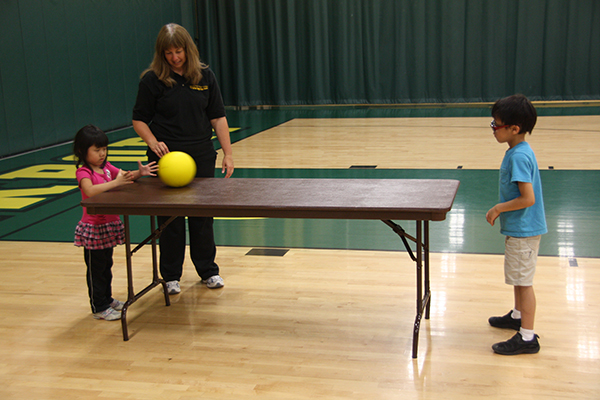
Figure 6-3a.Catching a big ball: Photo: Two children sit on the floor facing each other. The girl prepares to roll a 7-inch ball to the boy. He pats the floor for an audio cue. A teacher provides verbal instruction. Figure 6-3b.Catching a big ball: Photo: The two children stand on opposite ends of a table. The boy rolls the ball to the girl who has her arms extended with palms facing each other. Figure 6-3c.Catching a big ball: Photo: The two children stand in an open area. The boy throws the ball, and the girl has arms extended. The ball lands in her arms, and her palms are ready to grasp it. Figure 6-4a.Catching a small ball: Photo: A boy underhand throws a beanbag to a girl. Her arms are extended with hands open. Figure 6-4b.Catching a small ball: Photo: The boy tosses a 4-inch ball to a girl. She grasps the ball and brings her arms to her chest.
Cue: Say "1, 2, 3" as the ball is thrown and "Catch!" as the ball arrives at child.
Cue: Say, "Hands in front, elbows flexed, palms up, catch, and grip."
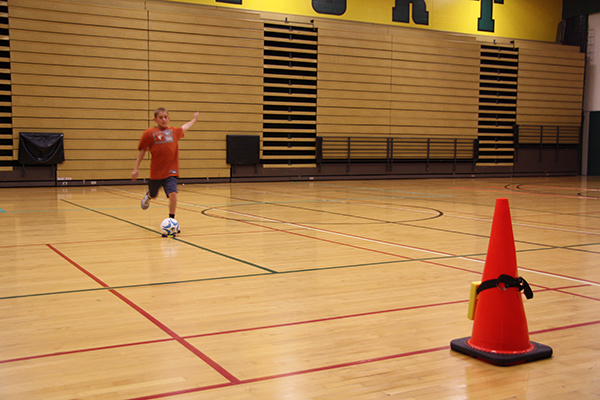
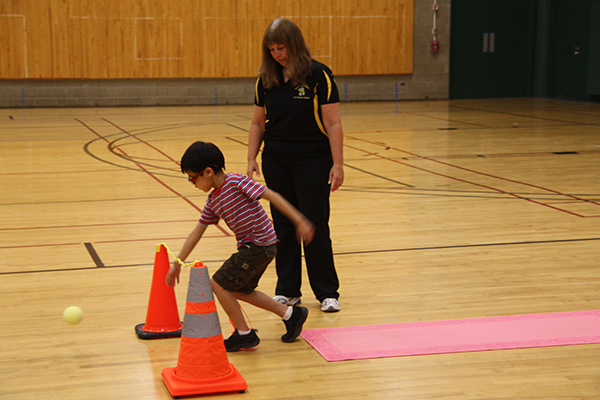
Skill: Kick
Description: Child kicks a ball. If the child has some usable vision, use a bright color ball that contrasts with the floor color. If the child has no vision, use a sound emitting ball. Tape two lines on the floor: one 20 feet from the wall and one 30 feet from the wall. Place a ball on top of a beanbag on the line nearer the wall. Instruct the child to stand on the other line. It is important that a child with no usable vision is positioned/oriented so that he is directly behind the ball. Tell the child to run to the ball and kick it as hard as he can.
Materials:
Minimum 30 feet clear space with a wall
Ball (bright color or sound adapted)
Beanbag
Florescent tape
Task Analysis/Practice:
Approaches the ball rapidly and continuously.
Demonstrates an elongated stride or leap just prior to ball contact.
Positions the nonkicking foot even with or slightly behind the ball.
Kicks the ball with the instep of preferred foot (on instep or toe).
Teaching Modifications and Adaptations:
Use a continuous sound emitting ball.
Rest the ball on plastic ring or bean bag.
Tap the floor just behind the ball with the child's cane and move the cane just prior to the child kicking the ball.
Position a portable sound source at the wall for a target.
Figure 6-5. Photo: A child kicks a ball toward a cone that has a portable sound source attached to it.
Teach the kick from a sitting position and transfer to standing.
Figure 6-6a.Pre-teaching a child who has deafblindness to kick: Photo: A teacher signs verbal instructions. >Figure 6-6b.Pre-teaching a child who has deafblindness to kick: Photo: The child sits in a chair and kicks the ball. Figure 6-6c.Pre-teaching a child who has deafblindness to kick: Photo: The child stands and kicks the ball.
Cue: Touch the knee.
Cue: Stand at the wall and say, "Kick the ball toward my voice."
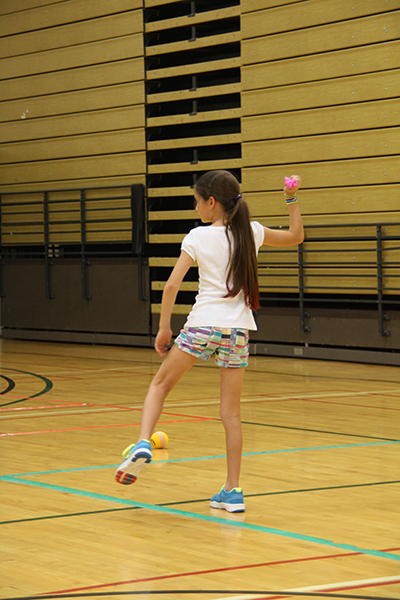
Skill: Overhand throw
Description: Child throws a ball overhand toward a wall. Attach a line of tape to the floor 20 feet from the wall. Instruct the child to stand behind the line. Place a sound source at the wall. Tell the child to throw the ball hard at the wall.
Initiates windup with downward and backward movement of hand and arm. Rotates body sideways until nondominant side of body faces the direction he is throwing.
Shifts weight onto back leg.
Steps forward (transfers weight) as he throws.
Follows through beyond ball release diagonally across the body toward the nondominant side.
Figure 6-7a.Overhand throw: Photo: A child shifts her weight to her back leg and rotates her body sideways. She holds her arm up and back at a 90-degree angle. The ball has a streamer attached, and it is crumpled into the girl's palm. Figure 6-7b.Overhand throw: Photo: The girl's arm is forward and across her midline with her hand resting on the outside of her opposite thigh. The streamer hangs from the ball, which is still in the girl's hand. The teacher physically guides the girl's arm and torso to rotate for the follow through. Figure 6-8. Photo: A teacher provides verbal instructions while a child grasps a ball and traces it along a tactile arc on a wall.
Teaching Modifications and Adaptations:
Use a streamer to help teach the child to follow through with his arm crossing midline.
Tape a cup to the wall and place ball on cup rim. Create a tactile arc on the wall with tape. The child grasps the ball and traces the tactile arc with the ball.
Cue: Touch the shoulder.
Cue: Stand at the wall and say, "Throw the ball toward my voice (or sound source)."
Skill: Underhand roll/throw
Description: Child underhand throws a ball toward a wall. Attach a line of tape to the floor 15 feet from a wall. Instruct the child to stand behind the line. One person stands beside the wall and taps a stick on the wall. Instruct the child to throw the ball underhand and hit the wall.
Materials:
Minimum 15 feet clear space and a wall
APH tennis ball or Wiffle® ball with jingle bells
A stick or cane
Extra person
Florescent tape
Task Analysis/Practice:
Orients body so that chest is facing the wall.
Swings the preferred hand down and back, extending the arm behind the trunk; keeps chest parallel to wall.
Steps forward with foot opposite the preferred hand toward the wall.
Tosses ball forward hitting the wall.
Swinging arm follows through after release of the ball at chest level or above.
Teaching Modifications and Adaptations:
Use a small pliable cone to assist with lunge.
Use a mat for a directional aid.
String a cord between two cones or standards, depending on child's height, for a "release the ball" or "toss forward" cue.
Figure 6-9. Photo: A child performs a lunge and lowers knee to touch a cone. Figure 6-10. Photo: A child bends his knee to touch a small cone located at the end of a mat. The child extends his arm forward until his wrist touches the cord strung between two large cones. His teacher provides verbal instruction.
Cue: Touch forearm.
Cue: Say, "Bend knees."
Cue: Say, "Opposite foot from hand."
Note: The underhand roll skill is vital to be an accomplished goalball player.
Chapter 7: Teaching Physical Fitness Skills
Photo: A teacher helps a young girl lift her shoulders up to perform a curl-up.
Physical activity and physical fitness are not the same thing. Regular physical activity improves physical fitness and provides many health benefits. According to the Centers for Disease Control and Prevention (2011), physical fitness is…
The ability to carry out daily tasks with vigor and alertness, without undue fatigue, and with ample energy to enjoy leisure-time pursuits and respond to emergencies. Physical fitness includes a number of components consisting of cardiorespiratory endurance (aerobic power), skeletal muscle endurance, skeletal muscle strength, skeletal muscle power, flexibility, balance, speed of movement, reaction time, and body composition. (para. 18)
Assessments of physical fitness provide an effective way to evaluate overall physical condition and potential risk for negative health outcomes. Physical fitness is also influenced by factors that are out of a person's control (e.g., genetics). Not everyone can be an elite athlete, but most people can achieve healthy levels of fitness by performing recommended amounts of physical activity.
To teach and practice a physical fitness skill, and to record progress for a possible Individualized Education Program (IEP) goal, use the Practice Record in Appendix C. For actual assessments, use the scoring record provided with your chosen assessment tool.
Skill: Curl-ups
Description: Child performs curl-ups on a mat. Child lies supine on a mat with her knees bent (approximately 140 degrees), legs slightly apart, and feet flat on the mat; hands rest lightly on thighs. If peer partners are monitoring each other, place a piece of paper under the child's head to validate that the head touches the mat each time; paper will bend. A child who is blind can place her fingers on the mat so the partner's head touches the tip of the middle finger upon touching the mat. Child slowly raises torso off the mat and slides her palms up the thighs to the knees. Child slowly lowers torso back to mat. Movement should be slow and gauged. The child does as many as possible with no more than 3 seconds in between. Some assessment protocols use a measuring strip, and the hands slide along the floor. Follow the instructions of your chosen assessment tool.
Materials:
Exercise mat
Optional: Piece of paper
Optional: Prerecorded cadence
Task Analysis/Practice:
Lies on back with knees bent; palms rest on thighs or palms flat on floor.
Curls shoulders up off floor; uses abdominal muscles.
Slides hands up to touch knees or slides palms along floor toward heels.
Slowly lowers torso to mat.
Feet remain on floor at all times.
Teaching Modifications and Adaptations:
Use a foam wedge to provide an incline until the child builds enough strength to perform the skill in a lying position.
Use miniature toy cars under palms to make sliding the palms forward easier and fun.
Figure 7-1a.Curl-up: Photo: A girl lies supine on a foam wedge with her arms straight along her sides; her palms rest flat on the mat. Her knees are bent, and her feet are flat on the floor. Figure 7-1b.Curl-up: Photo: The girl sits with her palms flat on the mat. Figure 7-1c.Curl-up: Photos: Palms rest on top of miniature toy cars on a mat.
Cue: Call a cadence or use a prerecorded cadence.
Cue: Touch knee or shoulder to cadence (for students with deafblindness).
Skill: Push-ups
Description: Child performs 90-degree push-ups at a rhythmic pace. The recommended cadence is 20 push-ups per minute (one 90-degree push-up every 3 seconds), but follow the protocol of your chosen assessment tool. The child completes as many 90-degree push-ups as possible. Practice (before test time) will help the student gain greater skill in knowing what 90 degrees feels like.
Materials:
Optional: Exercise mat
Optional: Prerecorded cadence
Task Analysis/Practice:
Lies prone on the exercise mat or floor.
Places palms on mat under or slightly wider than the shoulders with fingers stretched out.
Holds legs straight and slightly apart with toes tucked under.
Pushes up off the floor with the arms until arms are straight.
Body remains straight with no arch in back or rise in buttocks.
Lowers the body using the arms until the elbows bend at a 90-degree angle and the upper arms are parallel to the floor.
Teaching Modifications and Adaptations:
A square of cardboard that has a 90-degree angle may assist students who are blind to judge 90 degrees.
The knees may remain bent for a modified push-up if necessary.
This skill may be done standing up against a wall (child's feet placed 1-2 feet from the wall) as a lead-in activity. Hold an object on the wall as a cue to stop so the child's head does not hit the wall.
Use a small therapy ball to lessen the push distance until the child gains enough strength to complete the full movement.
Figure 7-2. Photo: A girl does a modified push-up where her chest touches a small therapy ball. Her elbow angle is approximately 90 degrees. Figure 7-3. Photo: A girl does a push-up with a piece of cardboard under her arm to indicate a 90-degree bend of the elbow.
Chapter 8: Conclusion
Photo: A teen jumps rope using an orientation mat and a ropeless jump rope.
Children with visual impairments, blindness, and deafblindness have various levels of physical potential. Children want to learn the same sports and skills that their peers learn, and they deserve the opportunity to reach their full potential. If children are told that a less than optimal performance in the run for example is adequate, they will think that their performance is appropriate as they will not know any different. It is up to professionals and parents to ensure that the highest level of performance is the standard for children with visual impairments.
Figure 8-1. Photo: Two boys wear eyeshades and run in a gym.
When children with visual impairments perform equal to their same age peers, they can be provided equal opportunities for sports, physical activity, and recreation. Once children are given these equal opportunities, they have unlimited potential to reach variables in the Expanded Core Curriculum such as independent living skills, self-determination, orientation and mobility, recreation and leisure, assistive technology, career development, and socialization (Haegele, Lieberman, Columna, & Runyan, 2014; Lieberman, Haegele, Columna, & Conroy, 2014).
The use of this gross motor development curriculum can bring the children with whom you work one step closer to reaching their goals.
The time, energy, and effort that you put into teaching this curriculum are well worth the potential outcomes. Thank you for taking the time to change the lives of the next generation of individuals with visual impairments, blindness, and deafblindness.
Barnett, L. M., Morgan, P. J., van Beurden, E., & Beard, J. R. (2008). Perceived sports competence mediates the relationship between childhood motor skill proficiency and adolescent physical activity and fitness: A longitudinal assessment. International Journal of Behavioral Nutrition and Physical Activity, 5(40). doi:10.1186/1479-5868-5-40
Best, C., Lieberman, L., & Arndt, K. (2002). Effective use of interpreters in general physical education. Journal of Physical Education, Recreation & Dance, 73(8), 45–50.
Cantell, M., Crawford, S. G., & Doyle-Baker, P. K. (2008). Physical fitness and health indices in children, adolescents and adults with high or low motor competence. Human Movement Science, 27, 344–362.
Cawley, J., & Spiess, C. K. (2008). Obesity and skill attainment in early childhood (Working Paper No. 13997). Retrieved from National Bureau of Economic Research Website: http://www.nber.org/papers/w13997
Cieslak, F., Lieberman, L. J., Haibach, P., & Houston-Wilson, C. (2015). Instructional preferences in aquatics for children with visual impairments and their instructors. Brazilian International Journal of Adapted Physical Education Research, (SOBOMA), 16, 9–14.
Haegele, J. A., Lieberman, L. J., Columna, L., & Runyan, M. (2014). Infusing the expanded core curriculum into physical education for children with visual impairments. Palaestra, 28, 44–50.
Hands, B. (2008). Changes in motor skill and fitness measures among children with high and low motor competence: A five-year longitudinal study. Journal of Science and Medicine in Sport, 11, 155–162.
Hands, B., & Larkin, D. (2006). Physical fitness differences in children with and without motor learning difficulties. European Journal of Special Needs Education, 21, 447–456.
Heydt, K., Allon, M., Edwards, S., Clarke, M. J., & Cushman, C. C. (2004). Perkins activity and resource guide: A handbook for teachers and parents of students with visual and multiple disabilities (2nd ed.). Watertown, MA: Perkins Publications.
Jazi, S. D., Purrajabi, F., Movahedi, A., & Jalali, S. (2012). Effect of selected balance exercises on the dynamic balance of children with visual impairments. Journal of Visual Impairment & Blindness, 106, 466–474.
Knowles, M. S. (1988). The adult learner: A neglected species (3rd ed.) Houston, TX: Gulf Publishing.
Kurtz, S., & Lee, T. D. (2003). Part and whole perceptual-motor practice of a polyrhythm. Neuroscience Letters, 338, 205–208.
Lieberman, L. J. (2011). Motor development curriculum: Children with visual impairments. Presented at the 143rd Annual Meeting of the American Printing House for the Blind, Louisville, Kentucky.
Lieberman, L. J., & Cowart, J. F. (2011). GAMES for people with sensory impairments: Strategies for including individuals of all ages. Louisville, KY: American Printing House for the Blind.
Lieberman, L. J., & Houston-Wilson, C. (2009). Strategies for inclusion: A handbook for physical educators. Champaign, IL: Human Kinetics.
Lieberman, L. J., Haegele, J.A., Columna, L., & Conroy, P. (2014). How students with visual impairments can learn components of the expanded core curriculum through physical education. Journal of Visual Impairment & Blindness, 108, 239–248.
Lieberman, L. J., Ponchillia, P.E., & Ponchillia, S.V. (2013). Physical education and sports for people with visual impairments and deafblindness: Foundations of instruction. New York, NY: AFB Blind Press.
Magill, R. A. (1993). Augmented feedback in skill acquisition. In R. N. Singer, M. Murphey, & F. L. K. Tennent (Eds.), Handbook of research on sport psychology (pp. 193–212). New York: MacMillan.
Magill, R. A. (2011). Motor learning and control: Concepts and applications (9th ed.). New York: McGraw-Hill.
National Association for Sport and Physical Education. (2004). Moving into the future: National standards for physical education (2nd ed.). Retrieved from http://www.aahperd.org/naspe/standards/nationalStandards/PEstandards.cfm
Nettlebeck, T., & Kirby, N. H. (1976). A comparison of part and whole training methods with mildly mentally retarded workers. Journal of Occupational Psychology, 49, 115–120.
O'Connell, M. E. (2000). The effect of physical guidance and brailling on self-efficacy during goalball for children who are blind. Unpublished master's thesis. State University of New York at Brockport.
O'Connell, M., Lieberman, L. J., & Petersen, S. (2006). The use of tactile modeling and physical guidance as instructional strategies in physical activity for children who are blind. Journal of Visual Impairment & Blindness, 100, 471–477.
Park, J. H., Wilde, H., & Shea, C. H. (2004). Part-whole practice of movement sequences. Journal of Motor Behavior, 36, 51–61.
Swanson, R. A., & Law, B. D. (1993). Whole-part-whole learning model. Performance Improvement Quarterly, 6(1), 43–53. doi: 10.1111/j.1937-8327.1993.tb00572.x
Tsutsui, S., & Imanaka, K. (2003). Effect of manual guidance on acquiring new bimanual coordination pattern. Research Quarterly for Exercise and Sport, 74(1), 104–109.
Wagner, M., & Haibach, P. (2012, March). Motor Development Curriculum: Children with Visual Impairments. Presented at the American Alliance for Health, Physical Education, Recreation and Dance National Convention and Exposition, Boston, MA.
Wagner, M. O., Haibach, P. S., & Lieberman, L. J. (2013). Gross motor skill performance in children with and without visual impairments—research to practice. Research in Developmental Disabilities, 34, 3246–3252. doi:10.1016/j.ridd.2013.06.030
Assessments
American Association for Physical Activity and Recreation. (2007). Adapted Physical Education Assessment Scale II [Measurement instrument]. Reston, VA: Author.
Bruininks, R. H., & Bruininks, B. D. (2005). Bruininks-Oseretsky Test of Motor Proficiency (2nd ed.)[Measurement instrument]. Minneapolis, MN: Pearson.
C & D Kofahl Enterprises. (1999-2016). DEVelopmental PROgramming Motor Skills Assessments [Measurement instrument]. Huntington Beach, CA: Author.
The Cooper Institute. (2015). FITNESSGRAM® [Measurement instrument]. Dallas, TX: Author.
Ulrich, D. (2000). Test of Gross Motor Development (2nd ed.) [Measurement instrument]. Austin, TX: PRO-ED Inc.
Ulrich, D. (in development). Test of Gross Motor Development (3rd ed.) [Measurement instrument]. Austin, TX: PRO-ED Inc.
Winnick, J. P., & Short, F. X. (1999). Brockport Physical Fitness Test [Measurement instrument]. Champaign, IL: Human Kinetics.
Photos: A boy turns on an electronic sound ball. A young boy runs along a textured guidebar, and an older boy runs along a guidewire.
Part III Appendices
Photo: A boy and girl kick an APH customized Rib-it-Ball™ back and forth.
Appendix A Protocol for Children who Have Visual Impairment
Object control skills
Two-hand strike of a stationary ball
Equipment/Space Adaptations: beep baseball (or other sound emitting ball), batting tee, aluminum bat
Cues: Shoulder to wall, dominant hand on top, step, swing
One-hand forehand strike of a self-bounced ball
Equipment/Space Adaptations: Quiet space with wall. APH 30-Love tennis ball, plastic paddle
Activity setup: Give the child a hoop and tell him to roll it across the floor.
Cues: Say, "Step (with opposite foot) and roll!"
Figure b-2. Photo: A child runs and underhand rolls a hoop across a gym floor.
Skill focus: Slide
Activity setup: On a low balance beam, have child stand sideways. The child holds the instructor's, paraeducator's, or peer's hands and steps sideways to end of beam. Repeat in the other direction.
Skill focus: Ready position (knees bent, hands on knees)
Activity setup: Teach the ready position. Explain that this position is used for most sports such as beep baseball, goalball, basketball, and it is the first movement in a slide, run, gallop, and so forth. Turn on music, and say, "Ready." The kids get in ready position, then walk or run around to the music until the word "ready" is heard again to get into ready position. Children can be callers.
Cues: Say, "Ready, bend knees, hands on knees."
Figure b-3. Photo: A child stands in the ready position, with hands on knees, as he prepares to slide.
Skill focus: Follow through for the throw
Activity setup: Give the child a streamer with bells on the ends. Tell the child to use her dominant hand and to reach high in the air, out, and forward.
Cues: Say, "Step (with opposite foot) and throw!"
Figure b-4. Photo: A teacher uses physical guidance to guide child's arm on follow through. The girl's ball has a streamer attached to it.
Skill focus: Gallop with stick horse or swimming noodle
Activity setup: Child uses a stick horse as a vehicle to facilitate the motion of galloping. The stick can be between the legs, or in front of the child.
Cues: Say, "Step forward, slide back foot to heel, (same foot) step forward, slide foot to heel, repeat."
Skill focus: Hip rotation and crossing midline (and weight transfer if possible)
Activity setup: Give the child a hula-hoop and have her roll it across the floor to the side as hard as she can.
Cues: Say, "Step and roll the hoop."
Appendix C Sample Practice Record
Name: P.L. Rodgers Skill: Run Date: 1/10/15 Subtest: Perceptual Motor ✗ Locomotor Object Control Physical Fit
Accomplished (✓-check mark) Needs practice (✗-cross mark)
Task Analysis
Trial 1
Trial 2
Trial 3
Moves arms back and forth from shoulders—without crossing midline—in opposition to legs
✗
✗
✓
Keeps elbows bent.
✗
✓
✓
Both feet are off the ground for a short period of time.
✗
✓
✓
Foot hits the ground lightly—landing between heel and midfoot—then quickly rolls forward (i.e., not flat footed).
✗
✗
✓
Support foot lands directly underneath the body with knee slightly bent.
✗
✗
✓
Nonsupport leg bent approximately 90 degrees.
✗
✓
✓
Keeps the head straight; does not tilt the chin forward.
Starts with large step and progresses to pushing off the back foot while landing on the opposite foot.
Advances to take off on one foot and land on the opposite foot.
Both feet are off the ground for a short period.
Reaches forward with the arm opposite the lead foot.
Name:Date:
Skill: Kick Subtest: Object Control ✓ Accomplished (check mark) ✗ Needs practice (x-mark)
Task Analysis
Trial 1
Trial 2
Trial 3
Approaches the ball rapidly and continuously.
Demonstrates an elongated stride or leap just prior to ball contact.
Positions the nonkicking foot even with or slightly behind the ball.
Kicks the ball with the instep of preferred foot (on instep or toe).
Name:Date:
Skill: Overhand Throw Subtest: Object Control ✓ Accomplished (check mark) ✗ Needs practice (x-mark)
Task Analysis
Trial 1
Trial 2
Trial 3
Initiates windup with downward and backward movement of the hand and arm. Rotates body sideways until nondominant side of body faces the direction he is throwing.
Shifts weight onto back leg.
Steps forward (transfers weight) as he throws.
Follows through beyond ball release diagonally across the body toward the nondominant side.

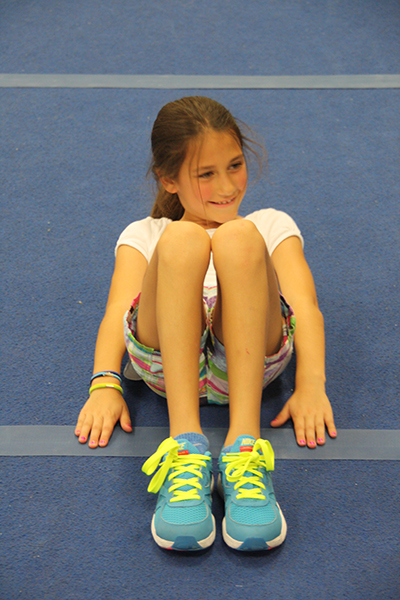
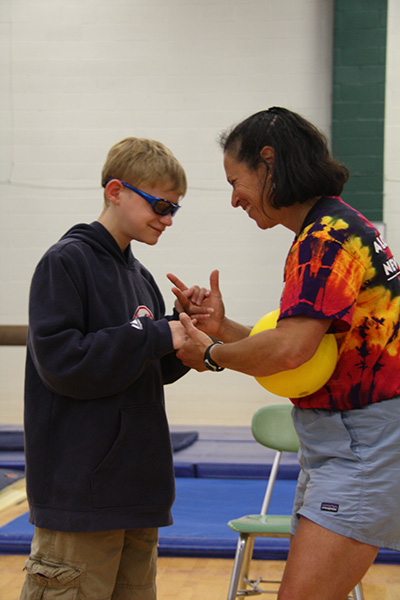
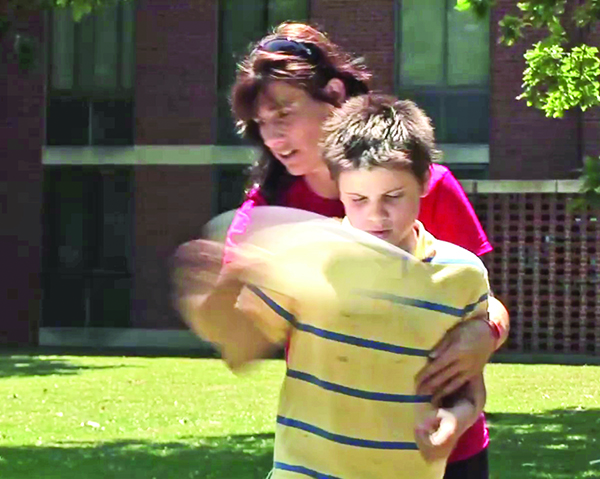
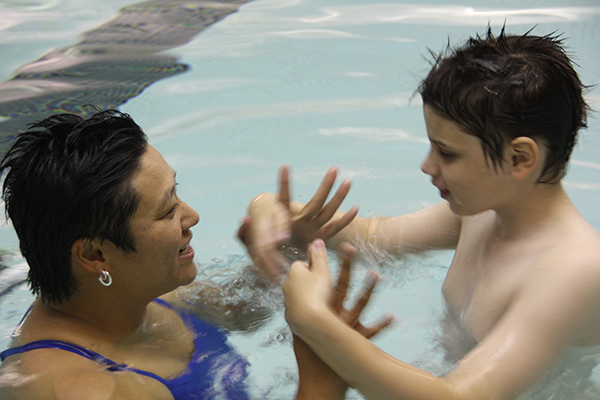
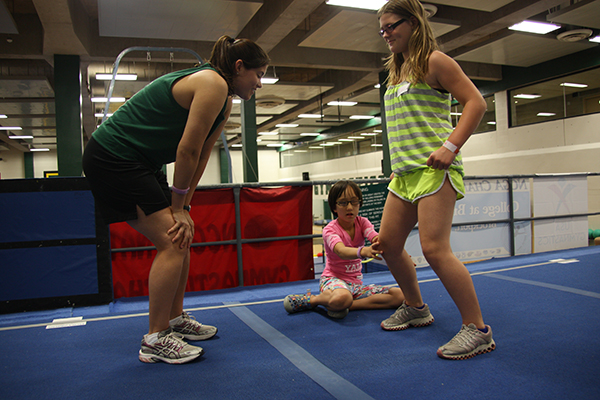
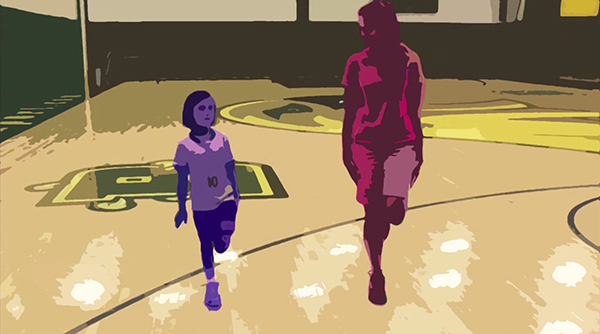
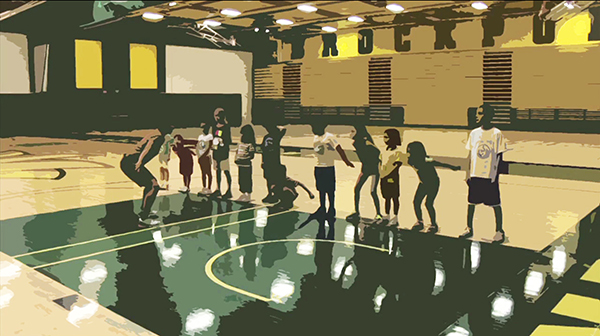
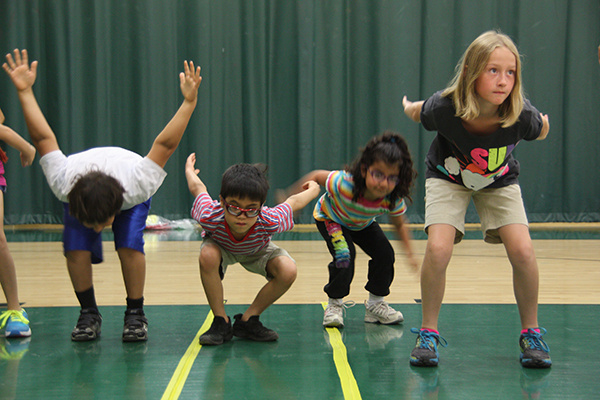

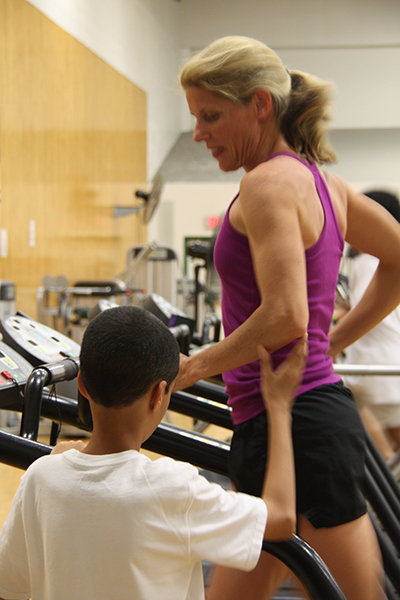

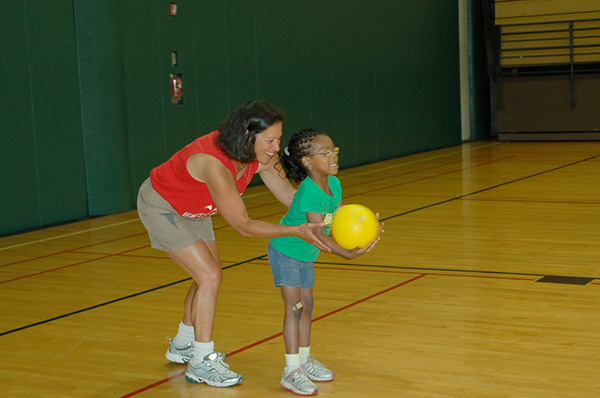


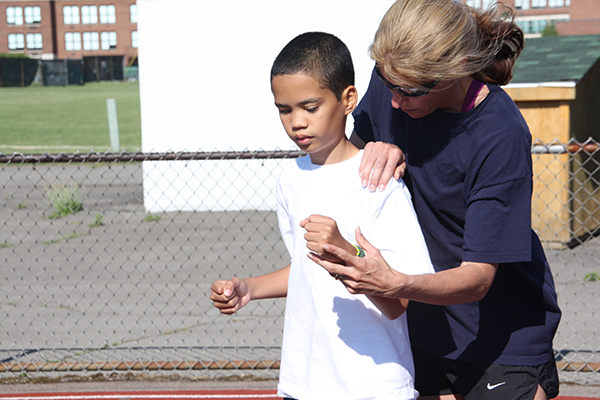
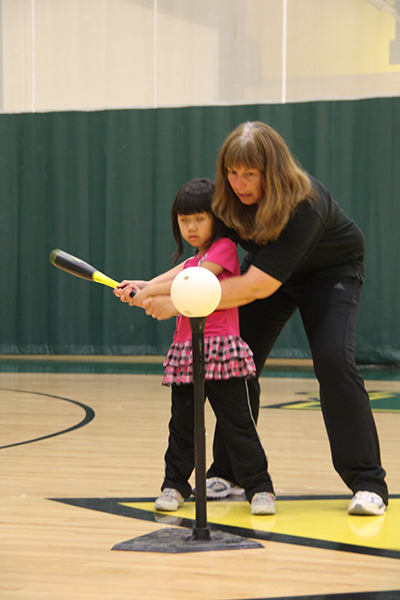
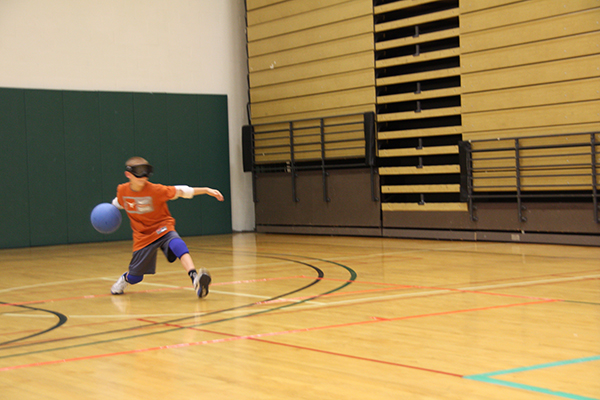
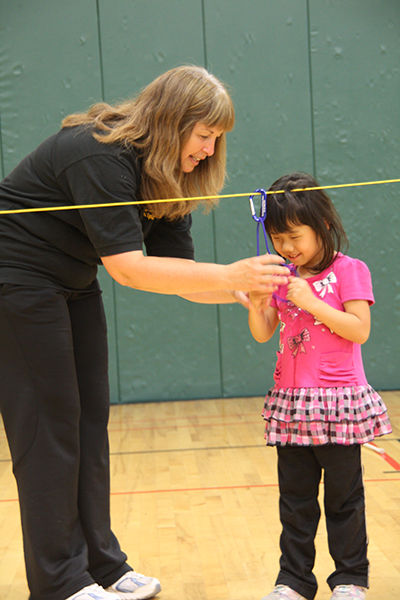
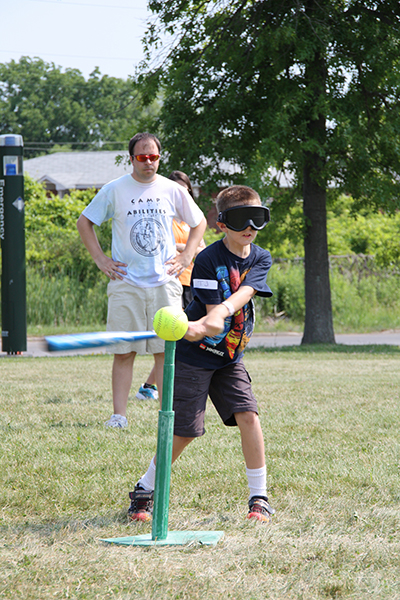
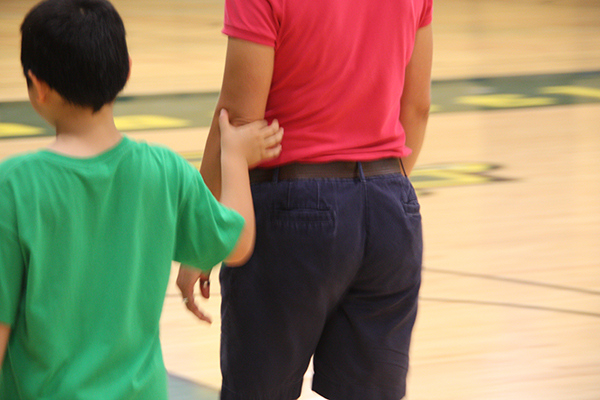
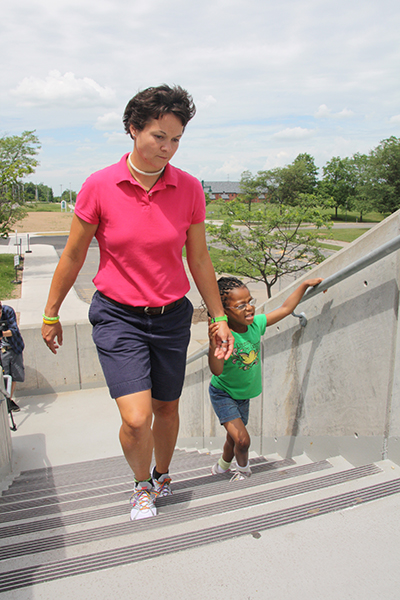
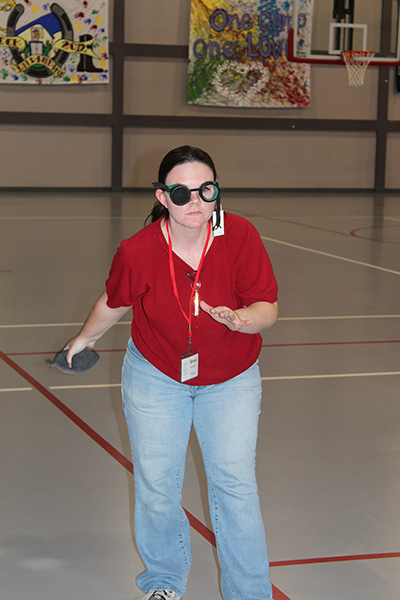
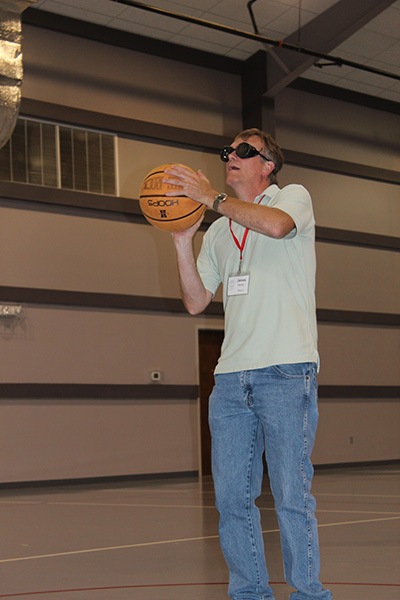
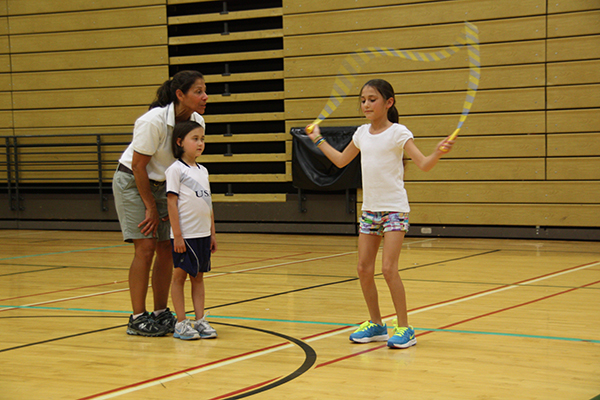
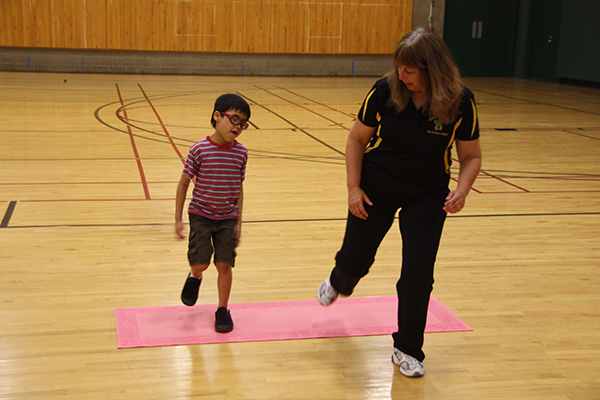

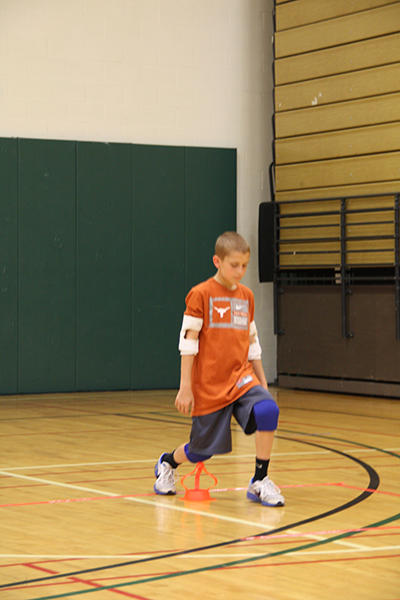
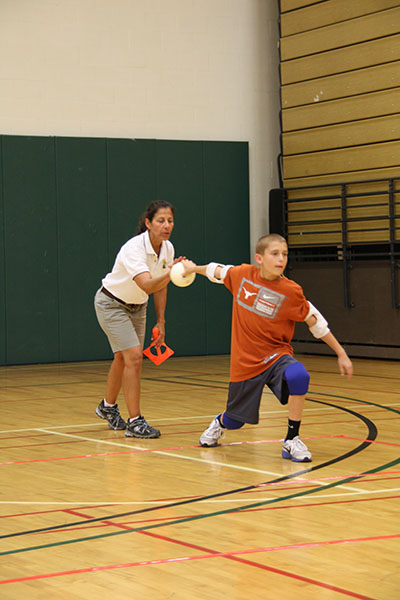
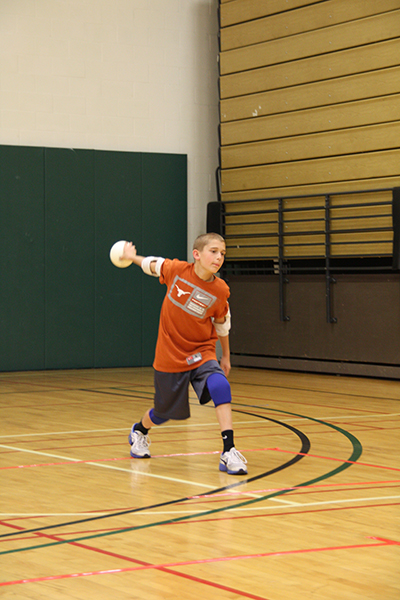
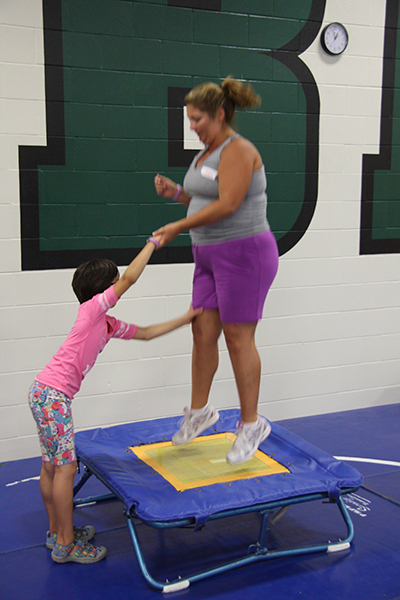
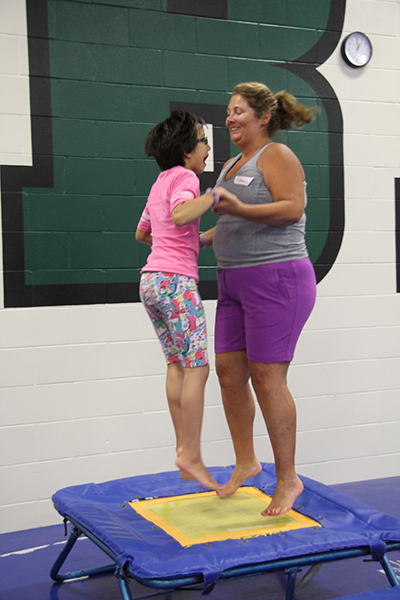
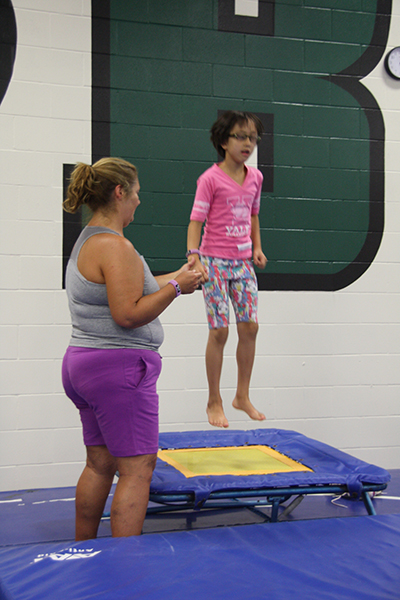
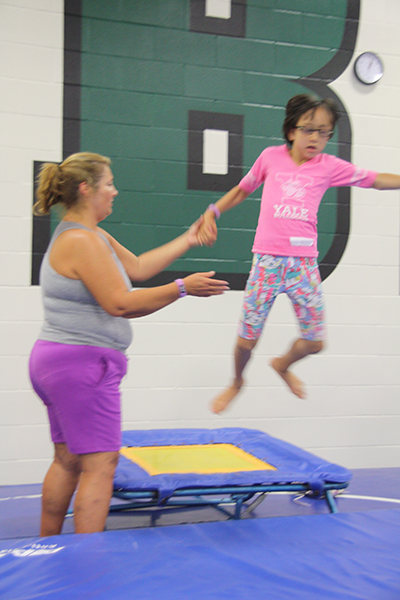
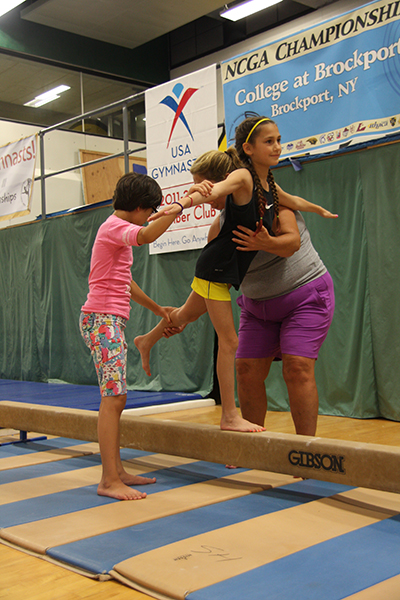
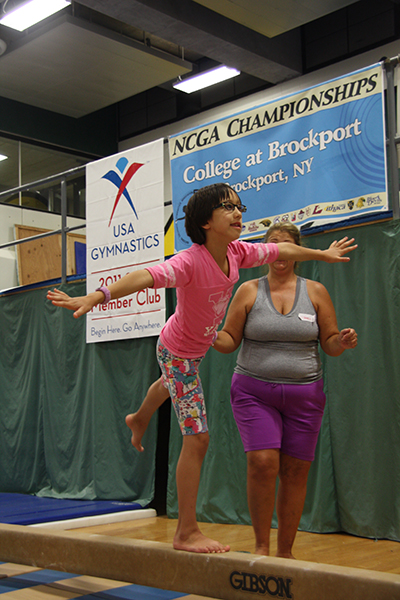
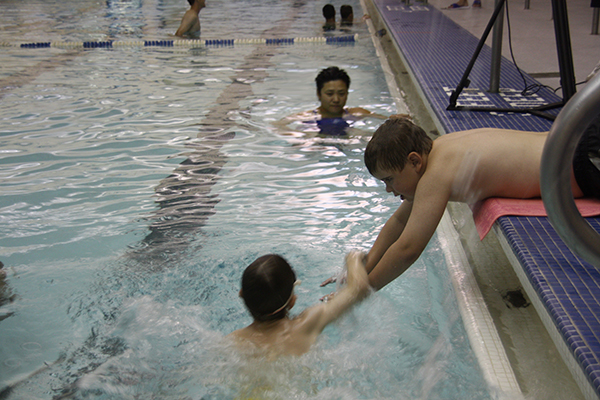
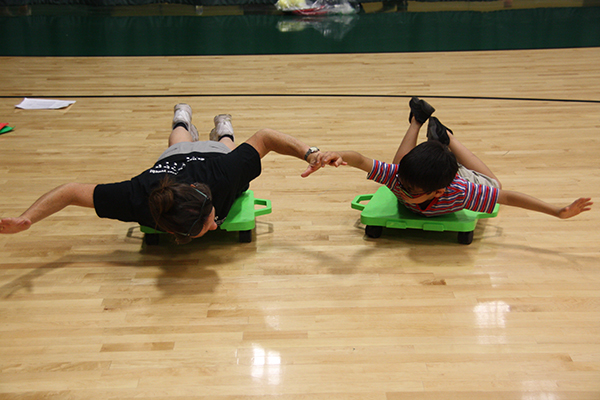
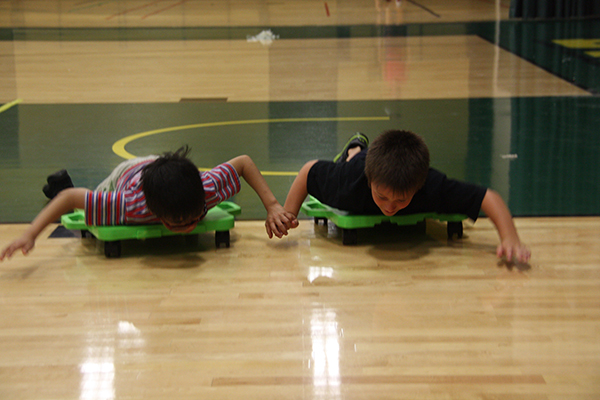
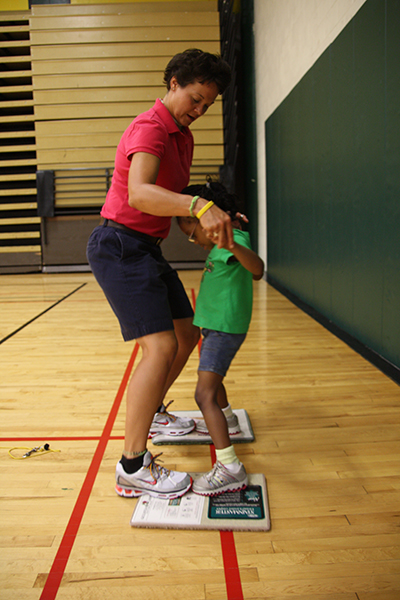
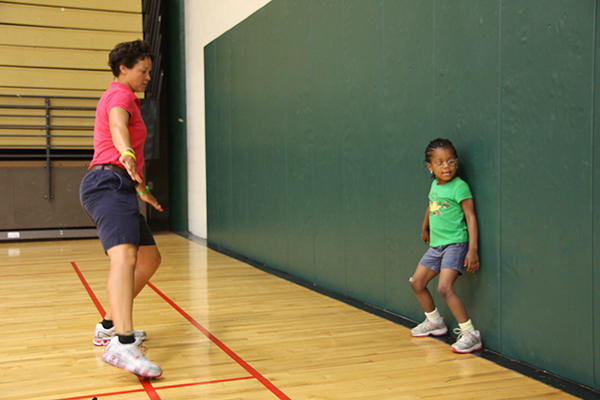
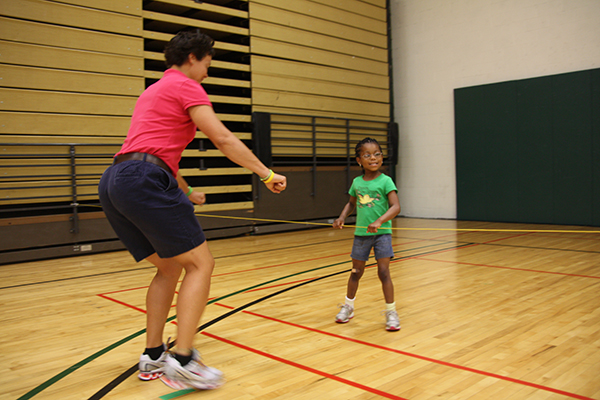
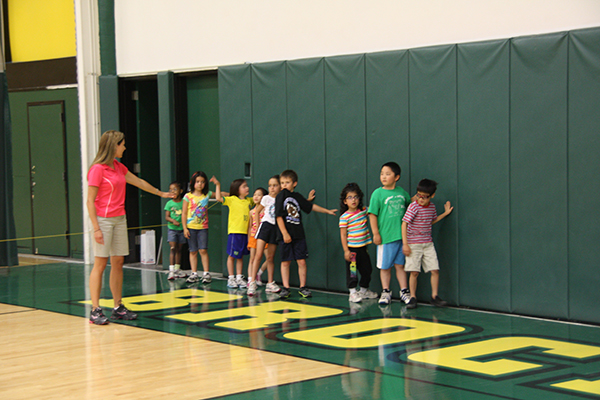
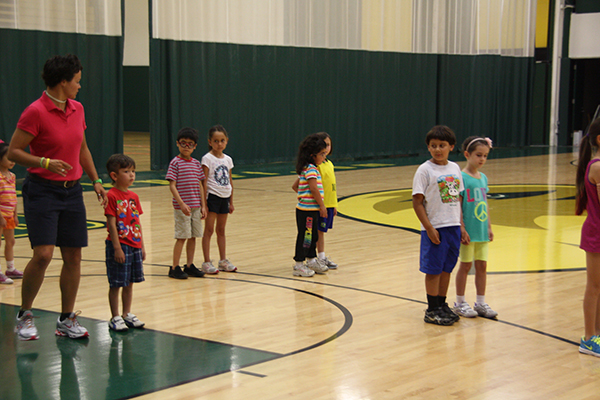


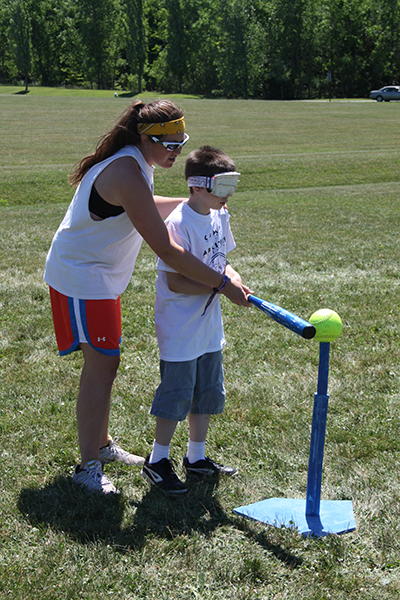


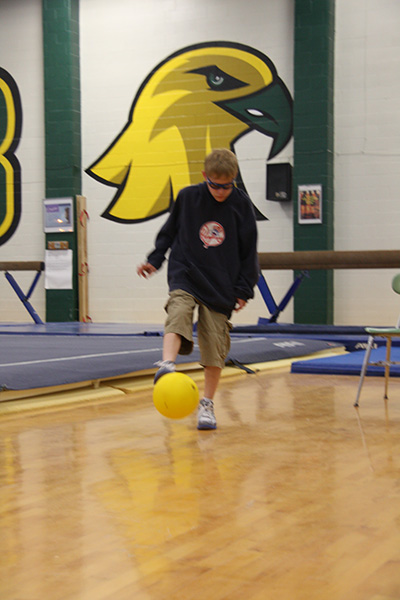
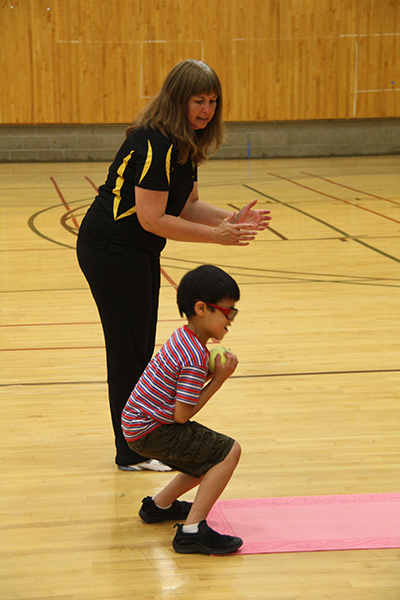
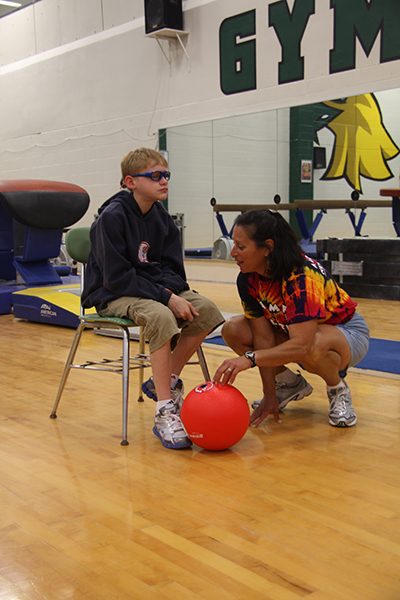
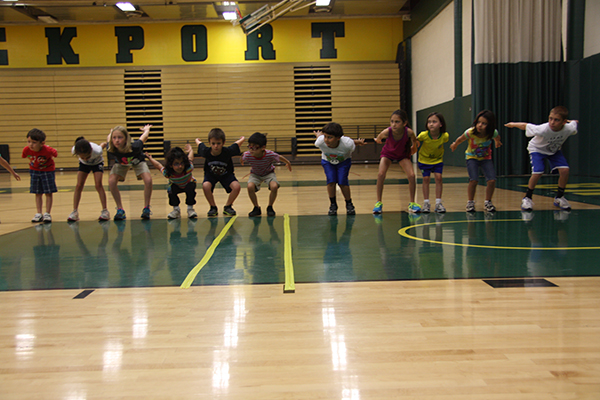
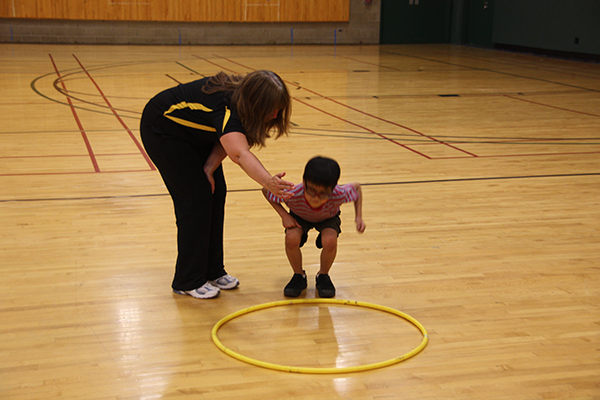
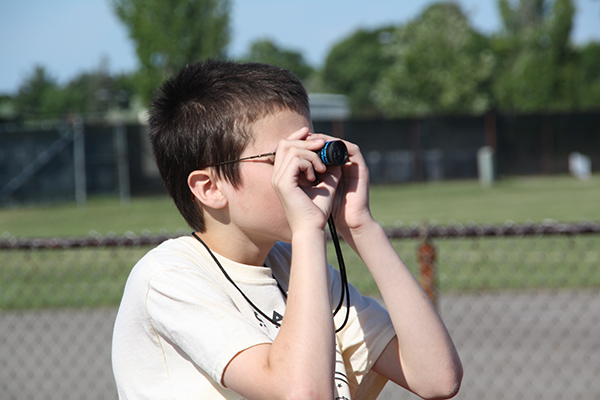
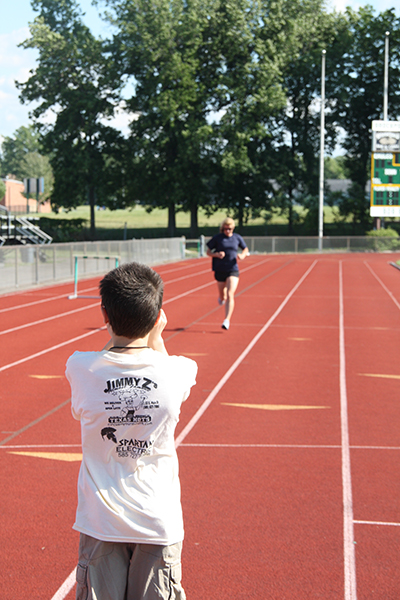
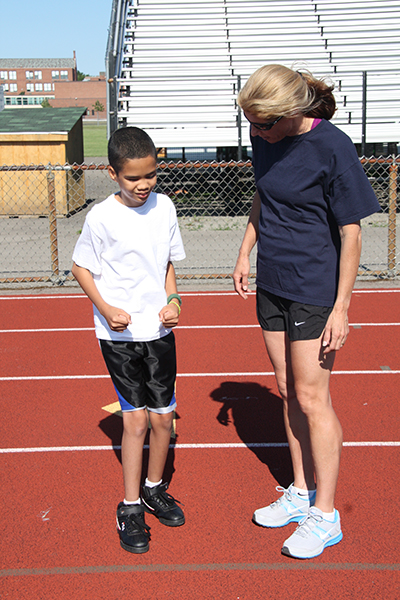
and50.jpg)
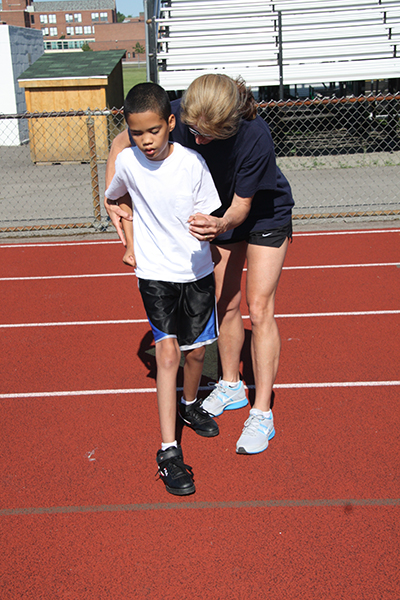
.jpg)